Job Server User Guide
This is the user guide to use the MediciaSAFELY Job Server. At the moment, the server is running at https://demo.mediciaresearch.cloud.
Steps to Use MediciaSAFELY
These are the steps the client should follow to use MediciaSAFELY and run jobs, here are the steps:
Client logins with GitHub
Client creates and submits an application/project.
Ask for a backend and organization.
Ask for adding project in the organization.
Ask for adding members to the project.
Edit project settings.
Create workspace.
Enter the GitHub PAT.
Run jobs.
View results.
The next sections covers these steps.
1. Client Login with GitHub
The client must login to MediciaSAFELY with their GitHub account: https://demo.mediciaresearch.cloud/login
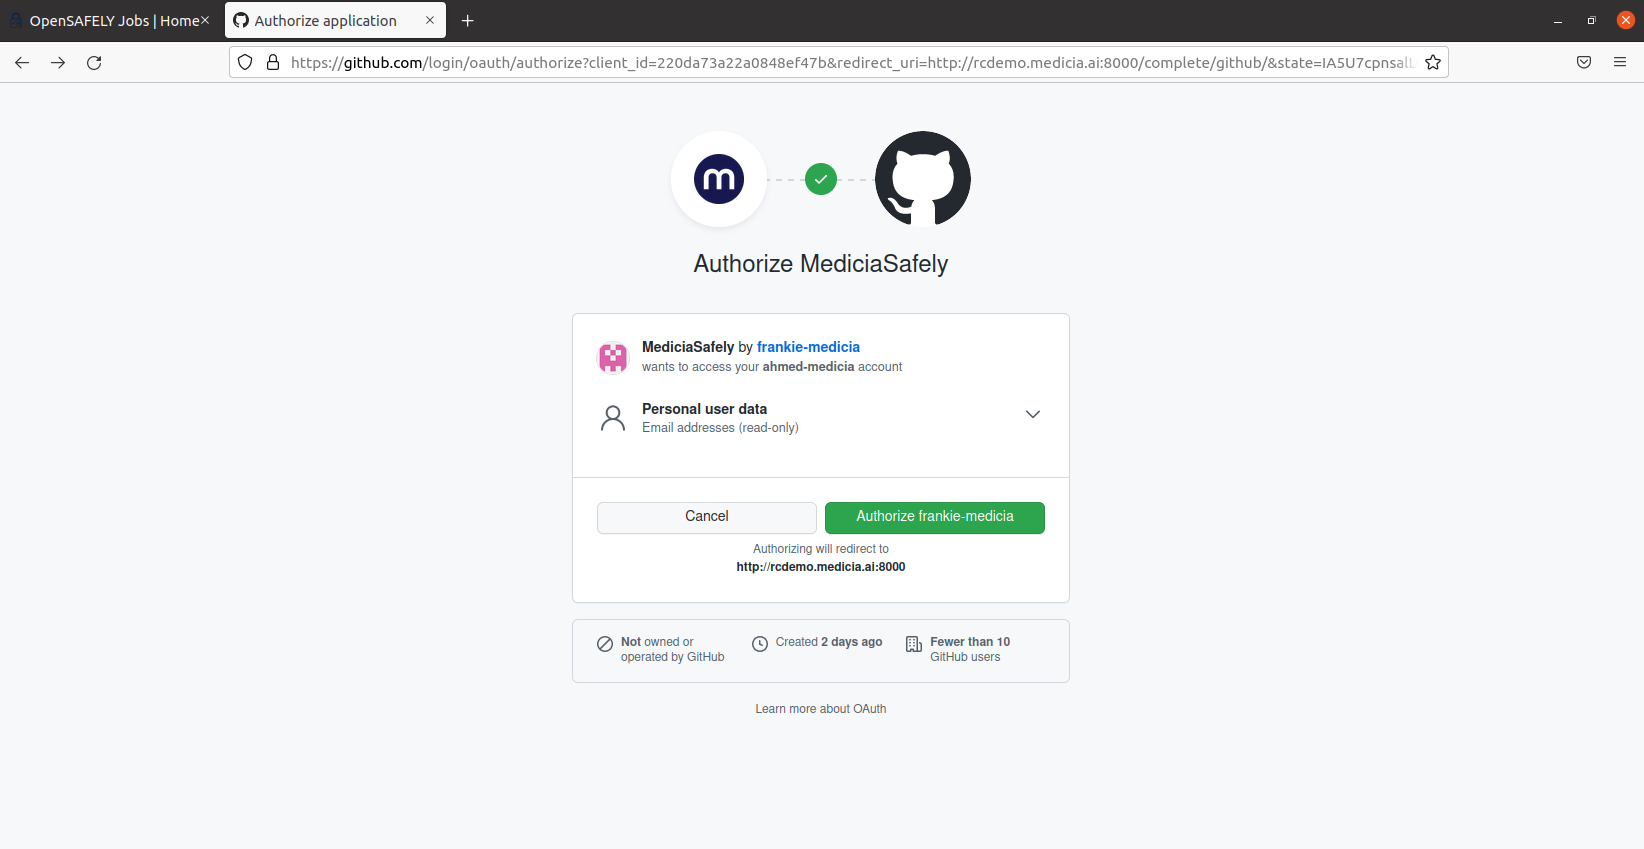
Then go to the login page and click the login button. You will be
directed to the GitHub login page. Then you will be asked for
authorizing MediciaSAFELY to login with your GitHub account. Just click
the green Authorize ... button.
After authorizing the app, you will be redirected to the server with successful login. In the next image, the icon of the GitHub account appears at the top-right.
2. Client Creates and Submits an Application/Project
Once the client logins to MediciaSAFELY, then the next step is to create an application/Project. Just click the GitHub account icon at the top-right corner and a menu appears.
If you are struggling creating an application, just contact the MediciaSAFELY team to create a project for you.
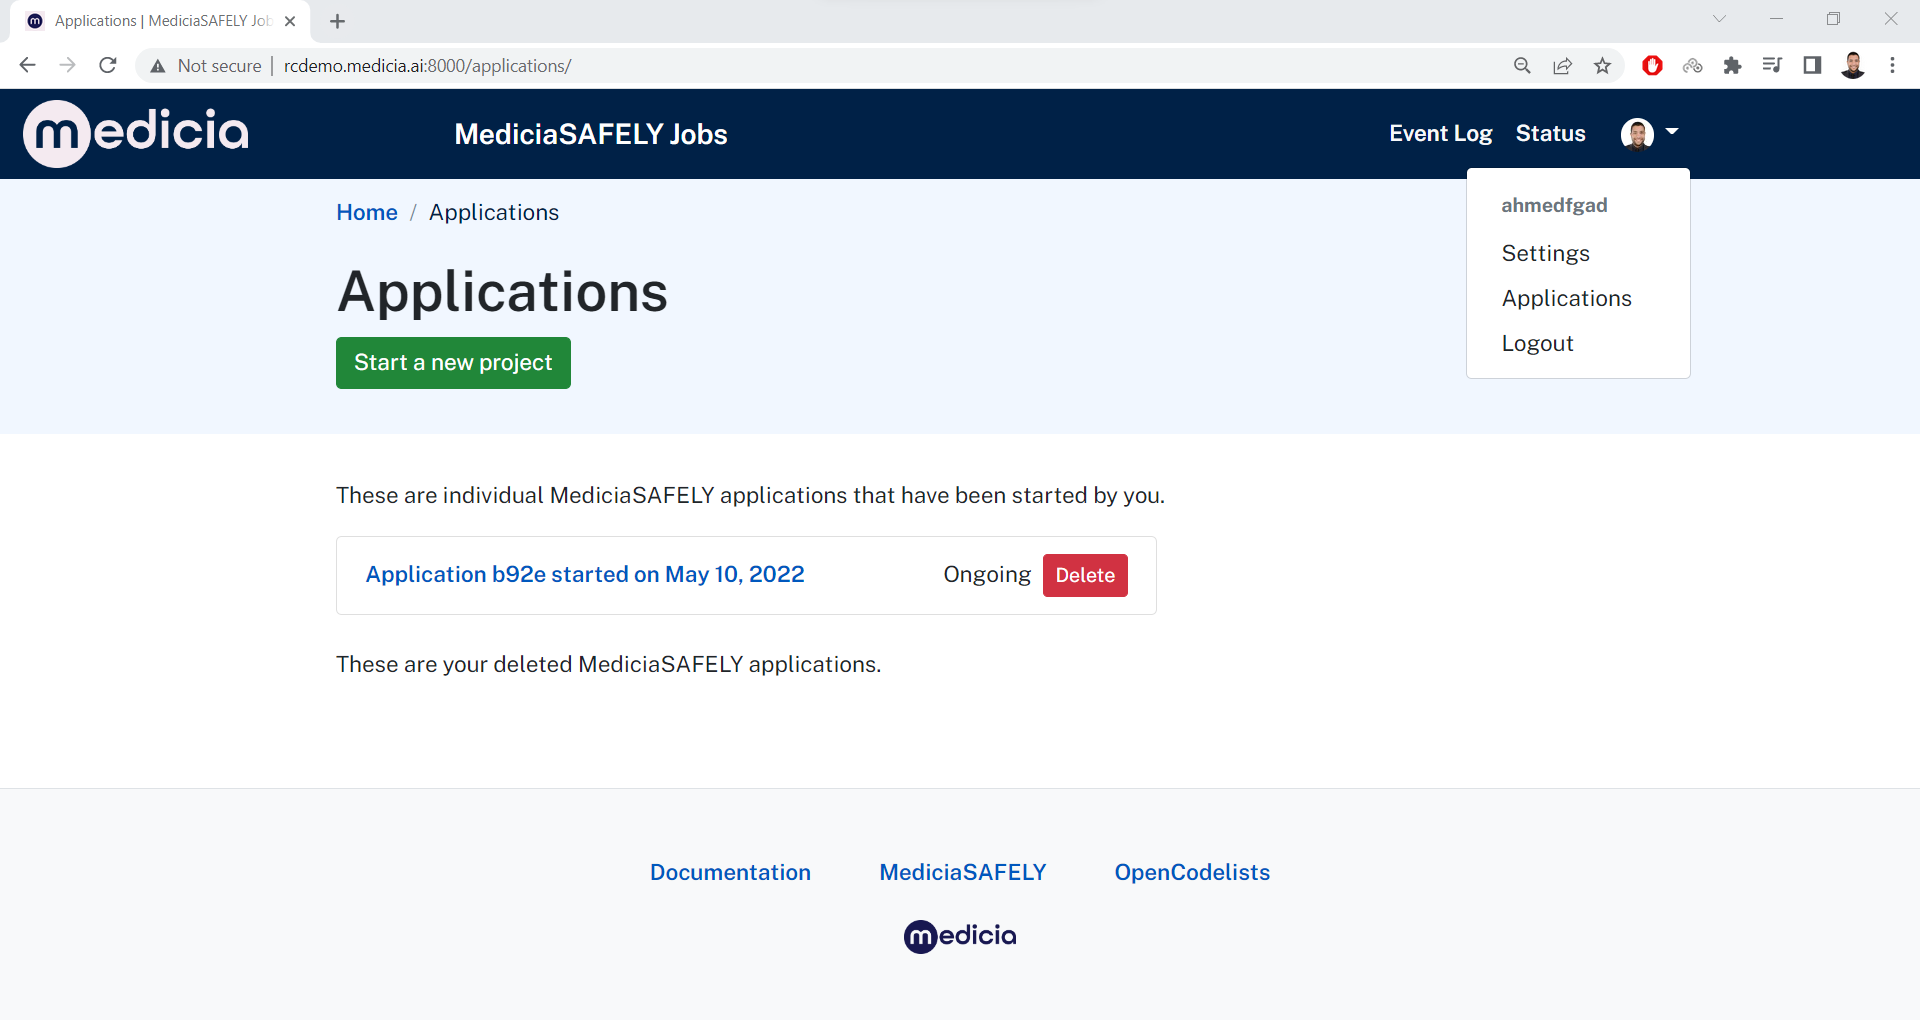
Click the Applications option which goes to this page:
https://demo.mediciaresearch.cloud/applications. THis page shows a list
of applications that the user started.
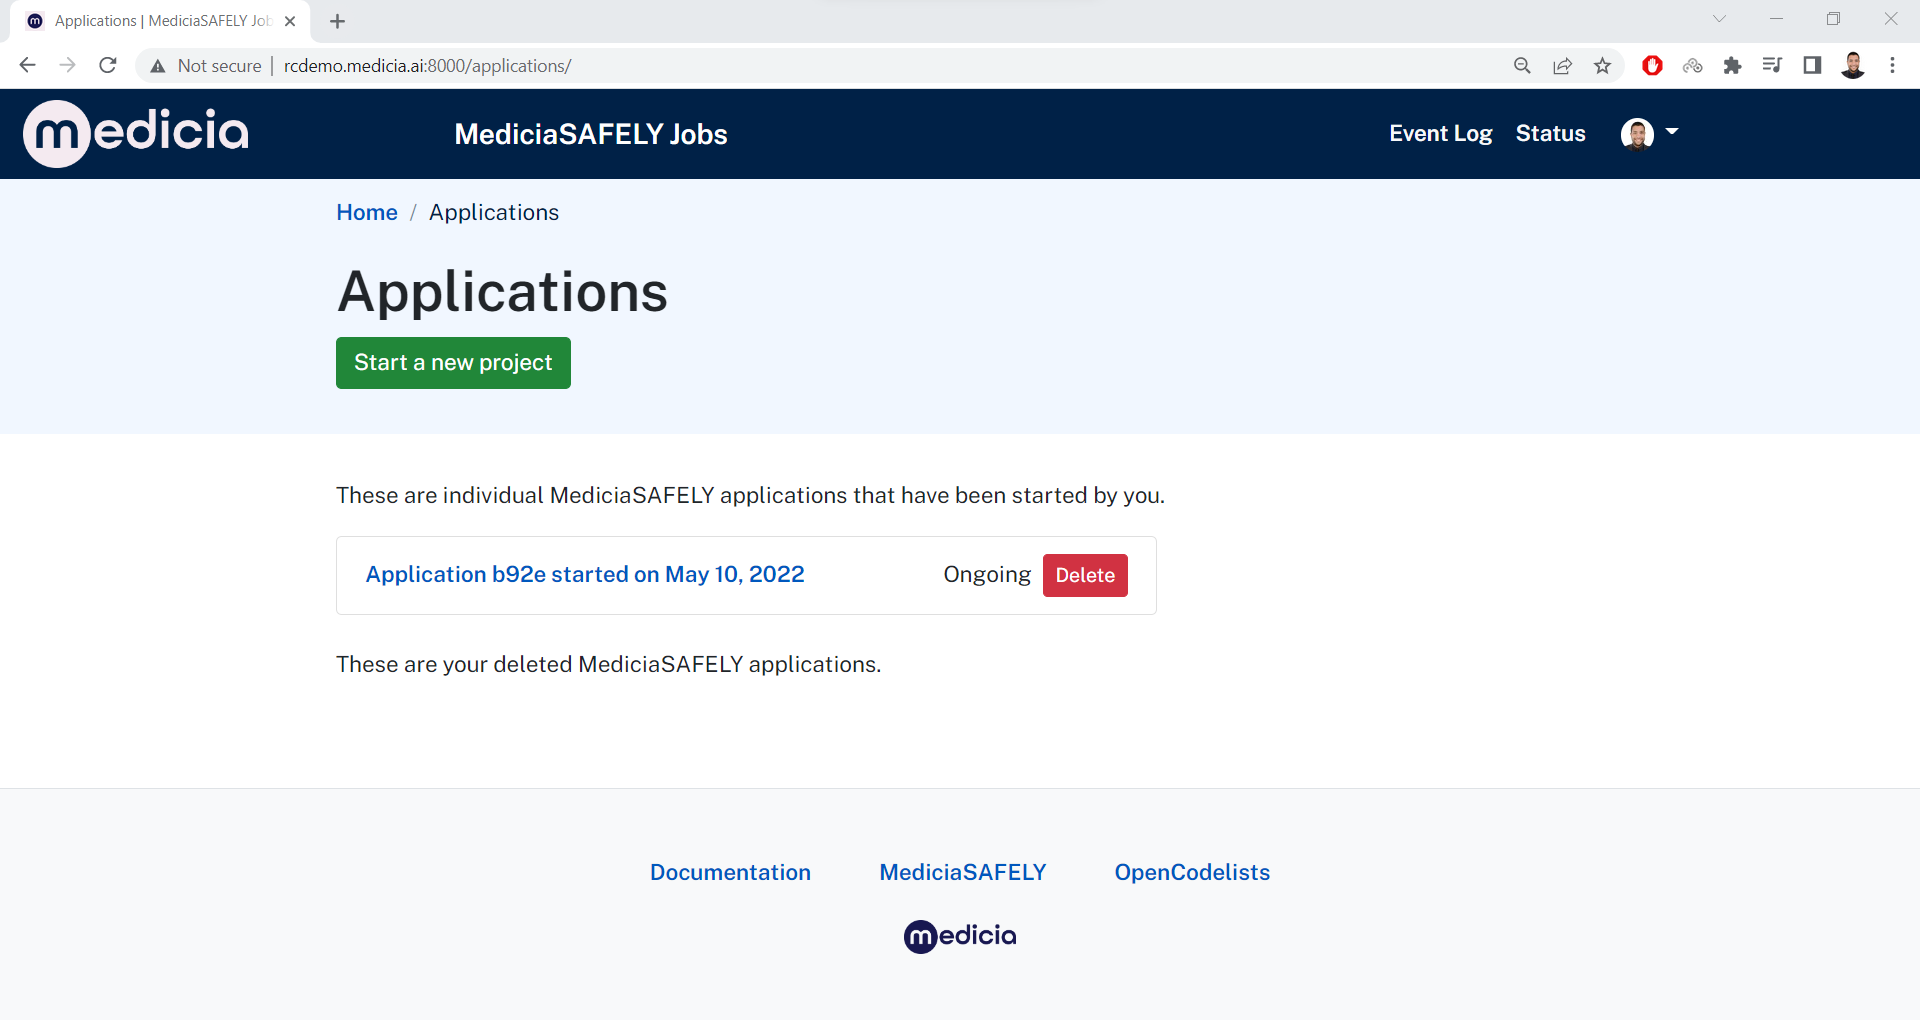
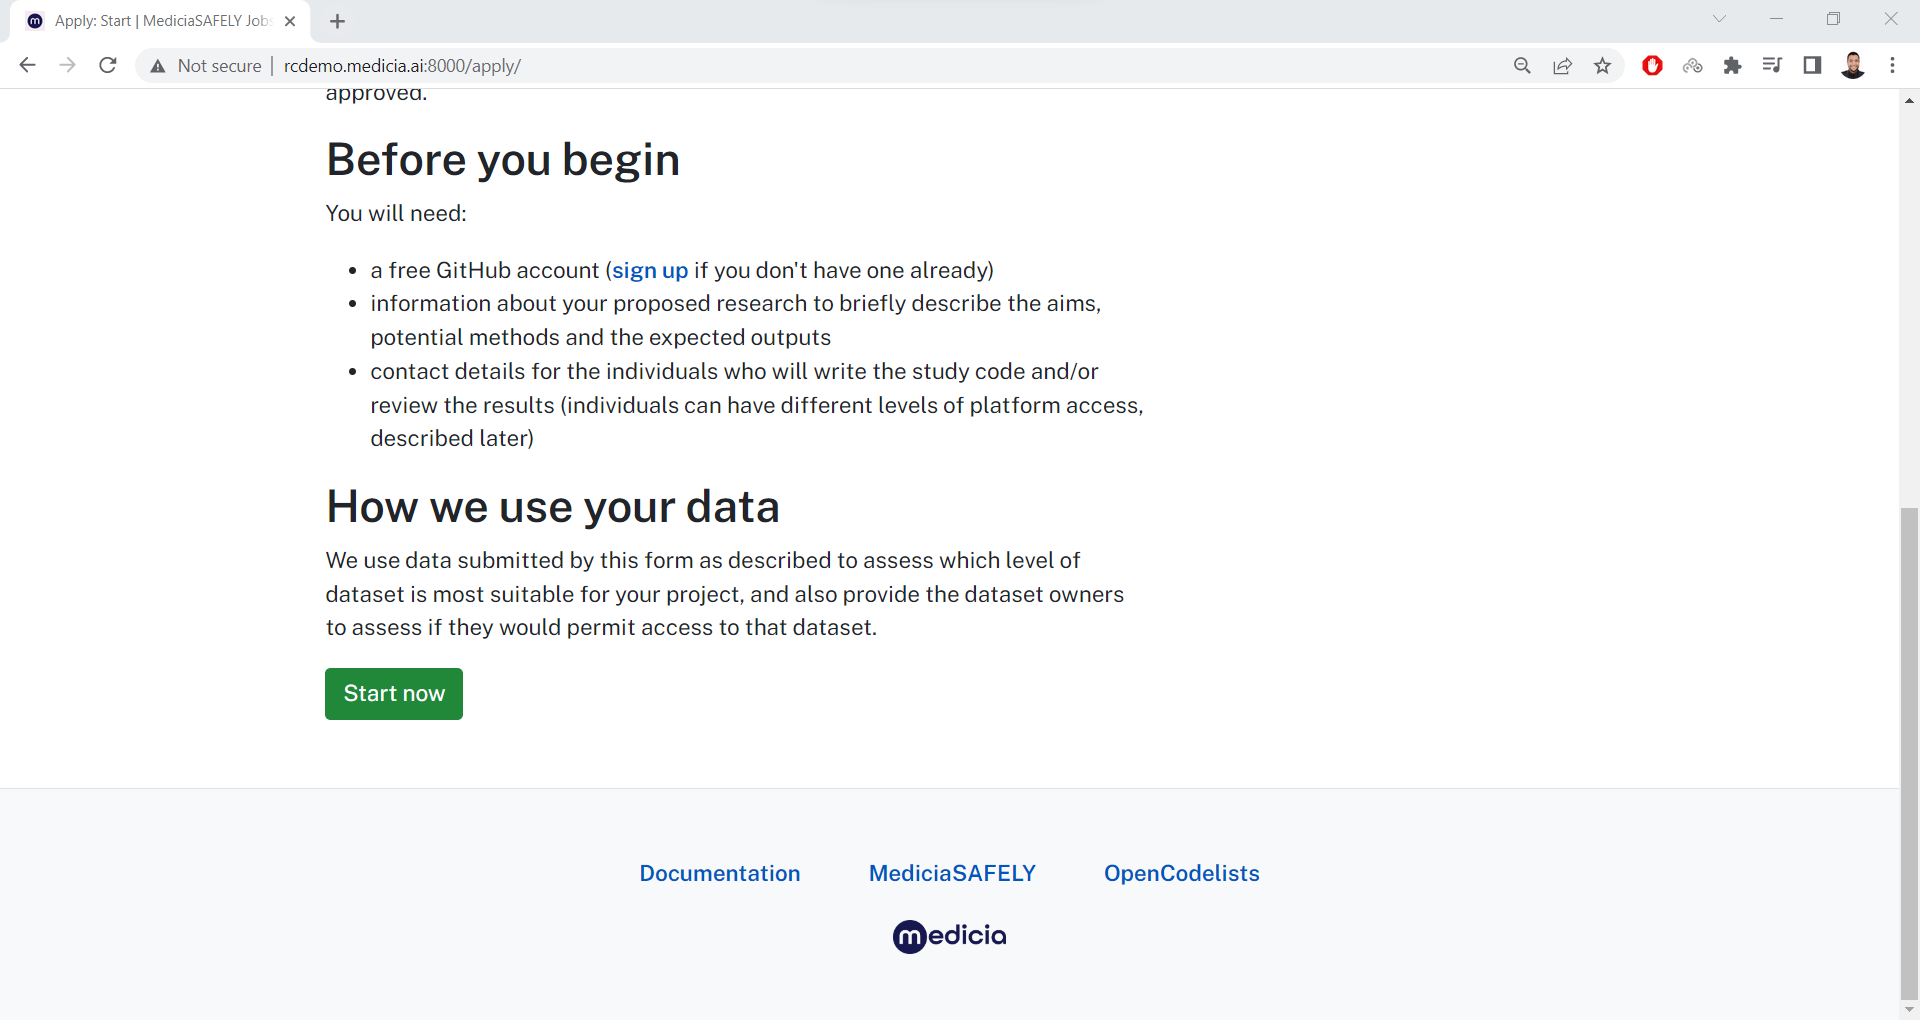
In the Applications page, click the Start a new project button which
goes to https://demo.mediciaresearch.cloud/apply. At the bottom of this
page, click the Start now button to start creating an application.
Follow the steps until the application is submitted. Pay attention to
the Study name value because it is the project name that the client
will later use. This name what appears on the dashboard too.
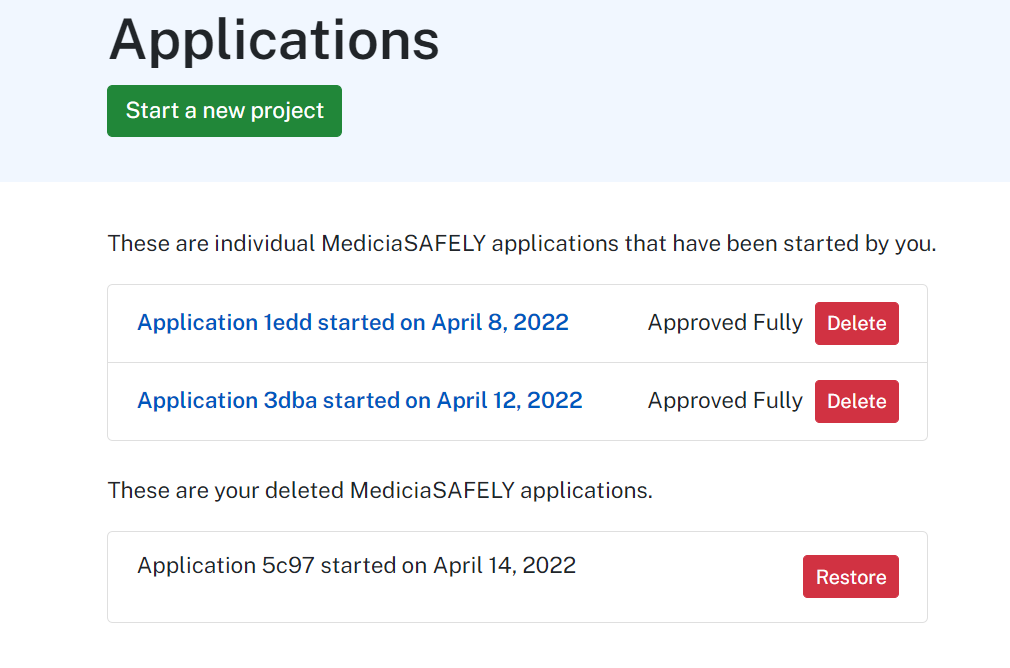
Once the application is submitted, just wait for a MediciaSAFELY admin
to approve it for you. The status of the applications appears in the
https://demo.mediciaresearch.cloud/applications page. When its status
changes to Approved Fully, then the application is approved by an
admin and ready to use. Now, you have a MediciaSAFELY project.
3. Ask for a Backend and Organization
Once the user owns a MediciaSAFELY project, next step is to ask for a MediciaSAFELY backend and organization. A MediciaSAFELY admin will take care of creating a backend and organization for you.
The admin is responsible for adding the users as a member in both the backend and organization.
The URL for the organization has this format
https://demo.mediciaresearch.cloud/[org-name] where [org-name]
should be replaced by the organization name.
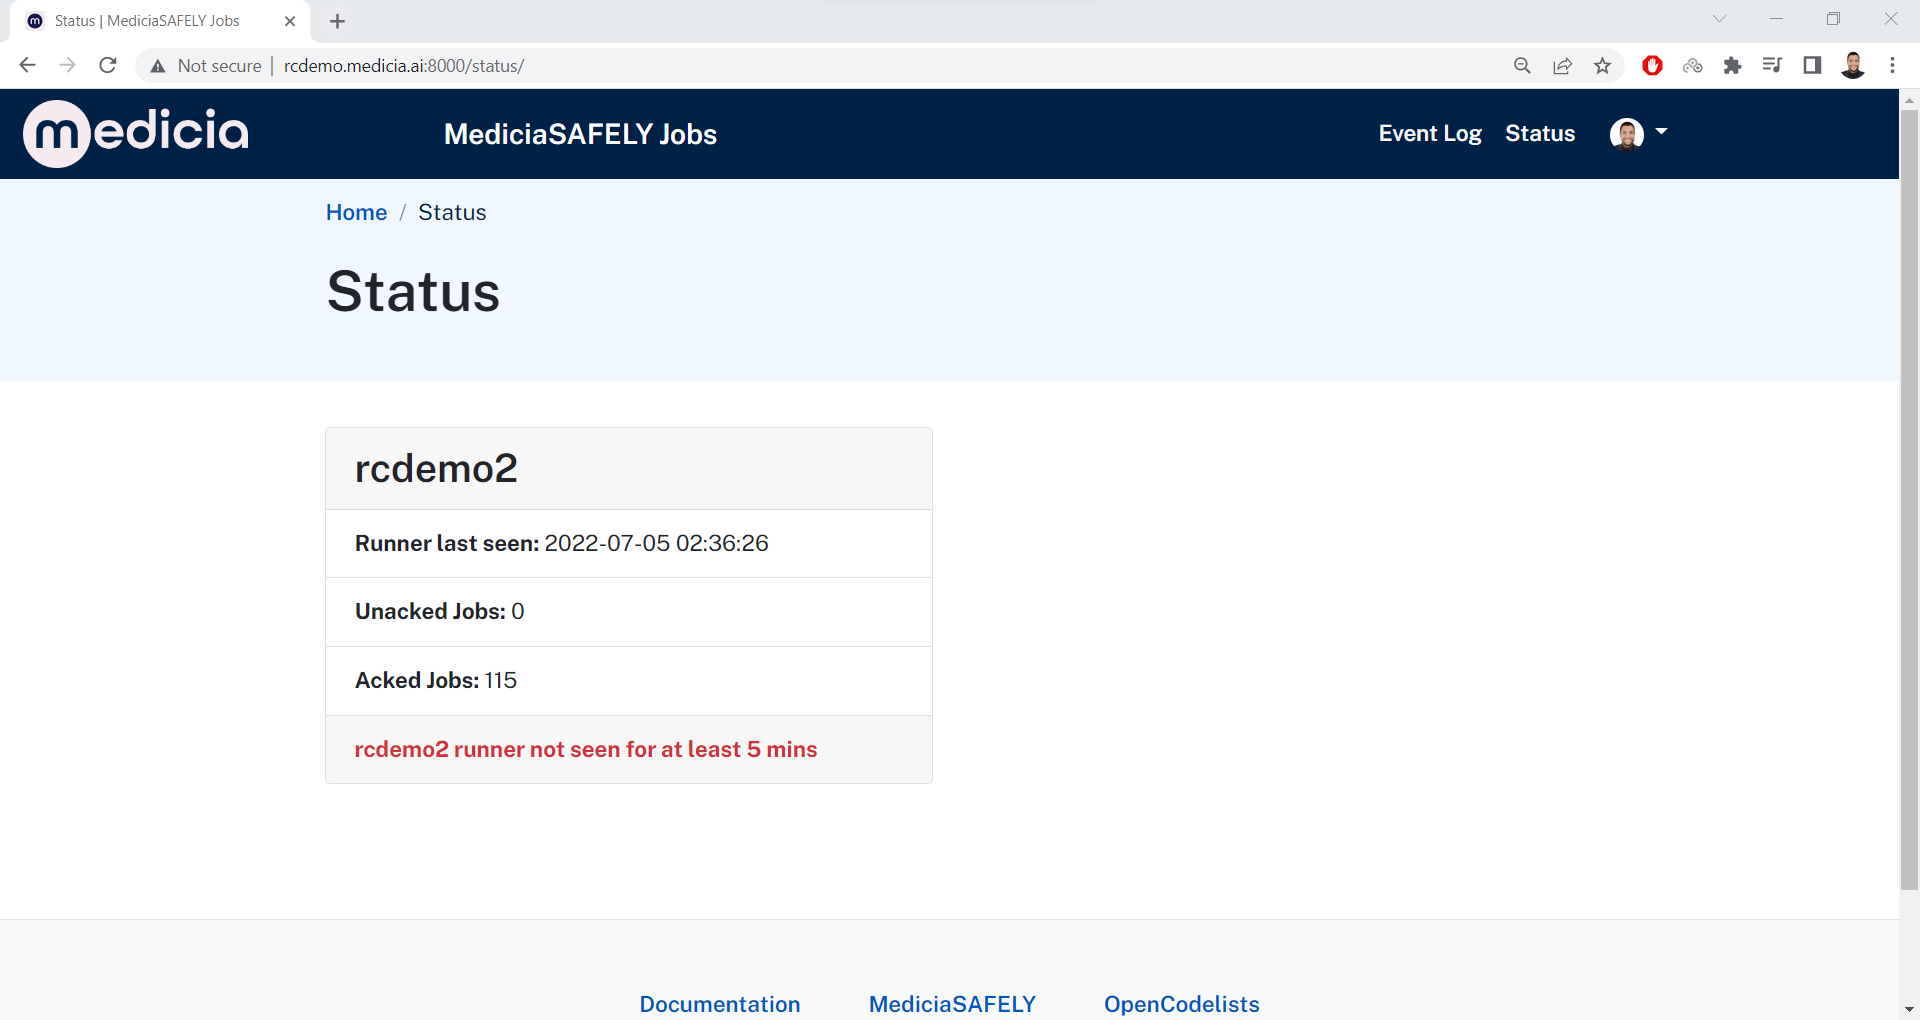
The user can check the backend he/she is a member by visiting this page:
https://demo.mediciaresearch.cloud/status. For example, the next image
shows that the current user is a member of the rcdemo2 backend.
4. Ask for Adding Project in the Organization
Before the user can use the project, a MediciaSAFELY admin must add the project in the organization. If not already added by an admin, contact the MediciaSAFELY team to ask for adding the project in your organization.
5. Ask for Adding Members to the Project
Only MediciaSAFELY admins can add members to the project. The regular
user can only edit (remove or change permissions) users who are already
members. But the user must be assigned the role/permission
Project Coordinator to edit the members.
The user must ask a MediciaSAFELY admin to be added as a member the project.
6. Edit Project Settings
For a regular user with the role Project Coordinator in the project,
then this user can edit the project settings. This includes editing
other members of the project by either:
Removing members from the project.
Changing the roles/permissions of the members.
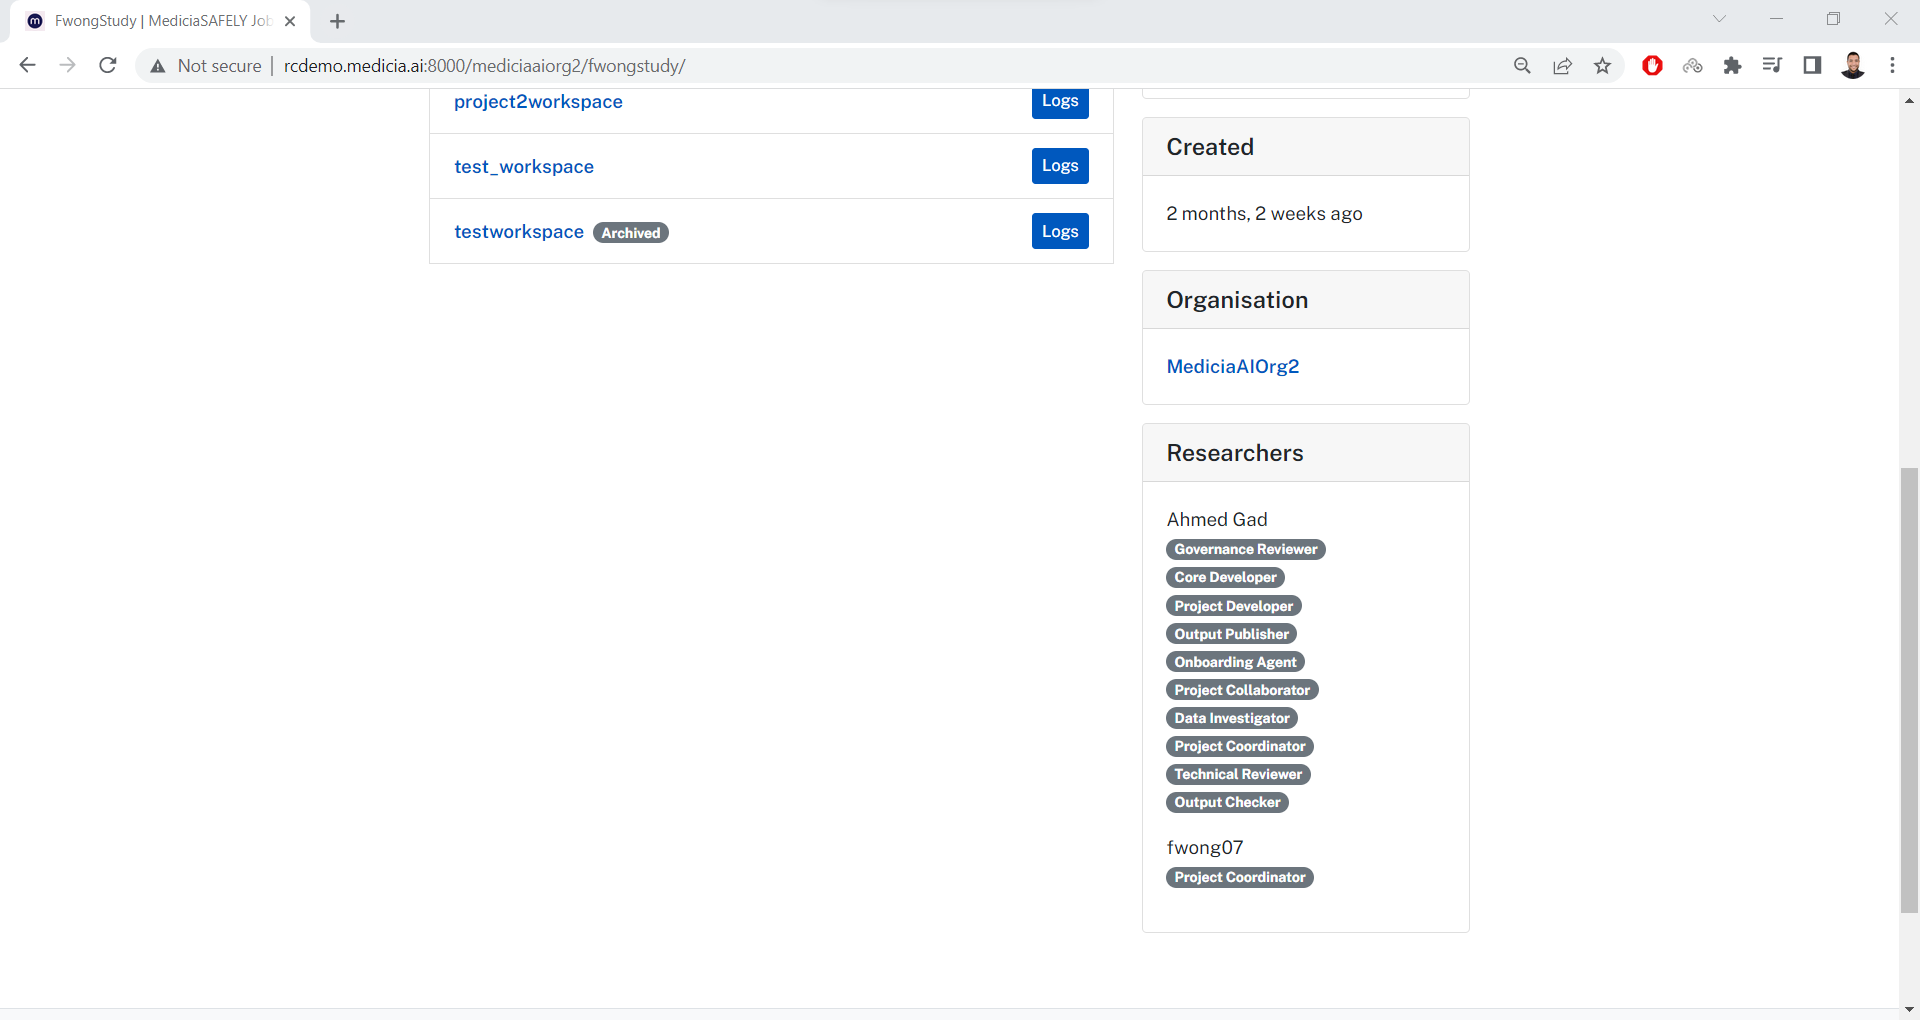
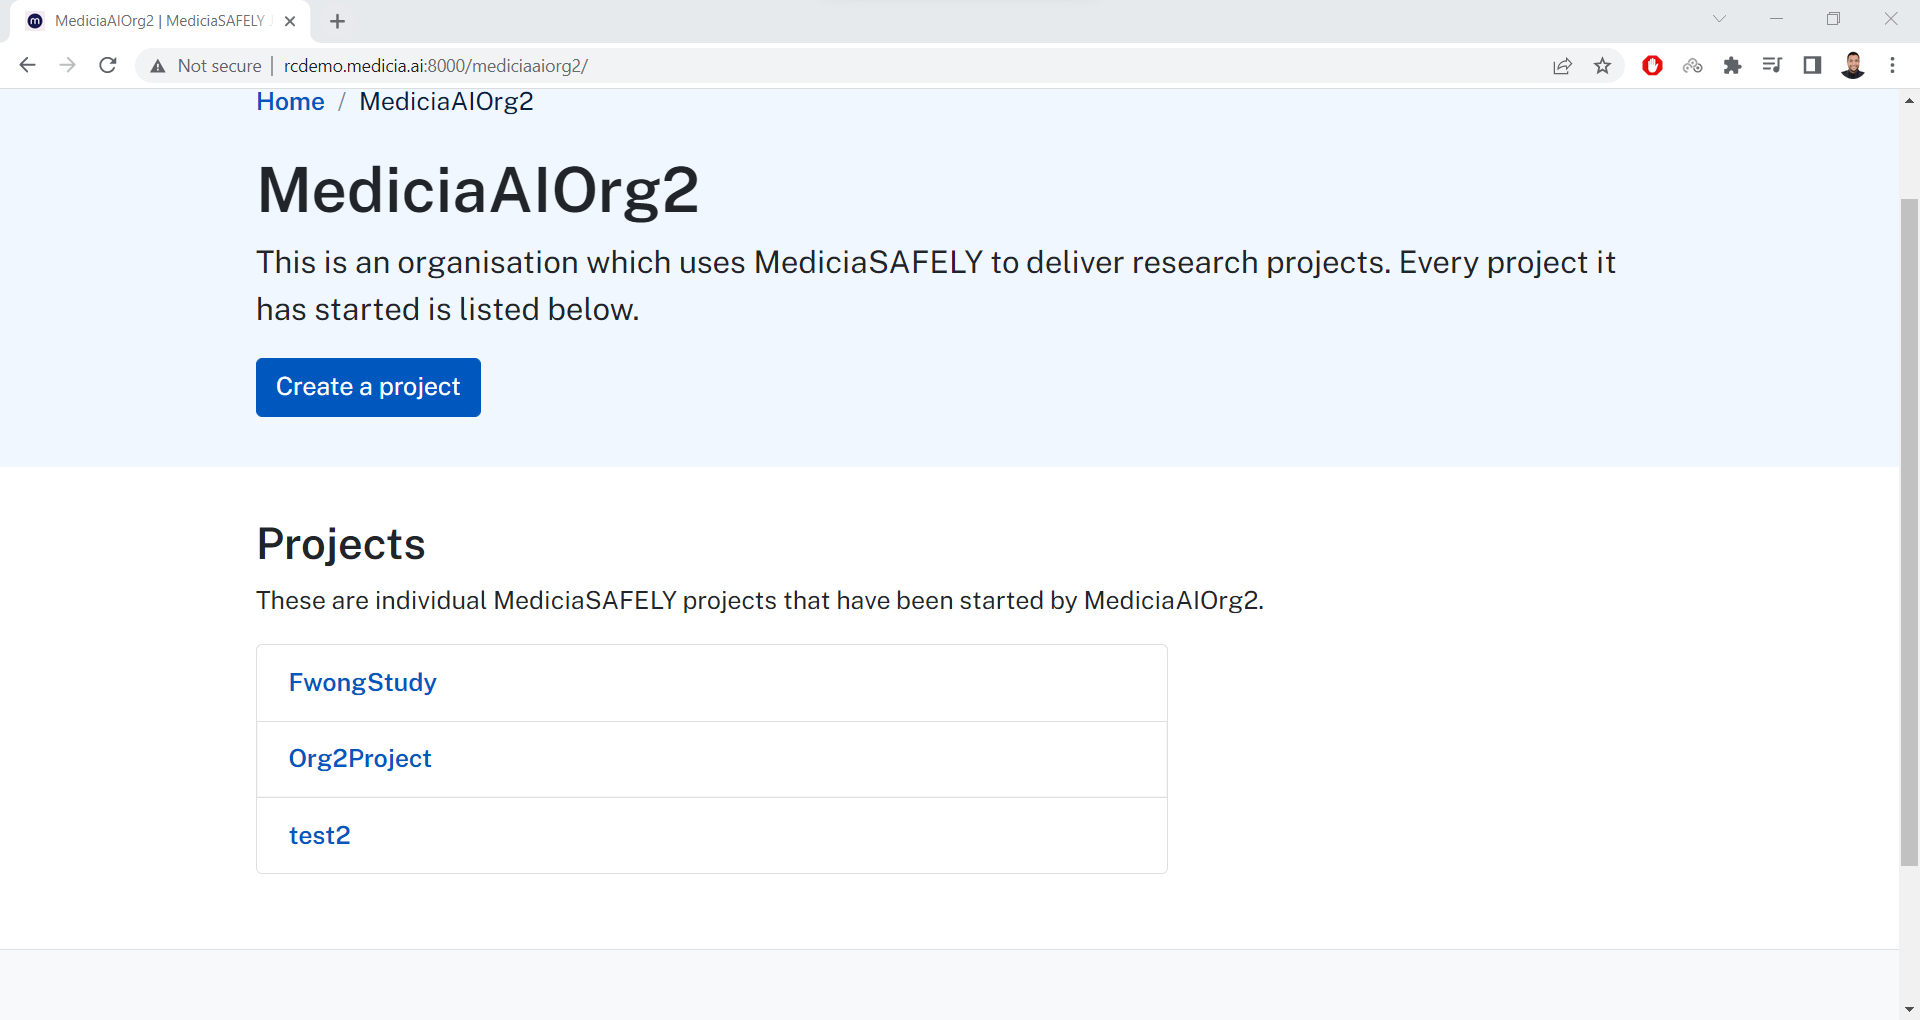
To do that, the first step is to go to the organization page. In the
organization page, there will be a list of projects in this
organization. For example, the next image shows that the
MediciaAIOrg2 organization has 3 projects.
For example, the current user is a member only in the MyStudy
project. After clicking this project, it goes to the project’s page:
https://demo.mediciaresearch.cloud/mediciaaiorg2/MyStudy
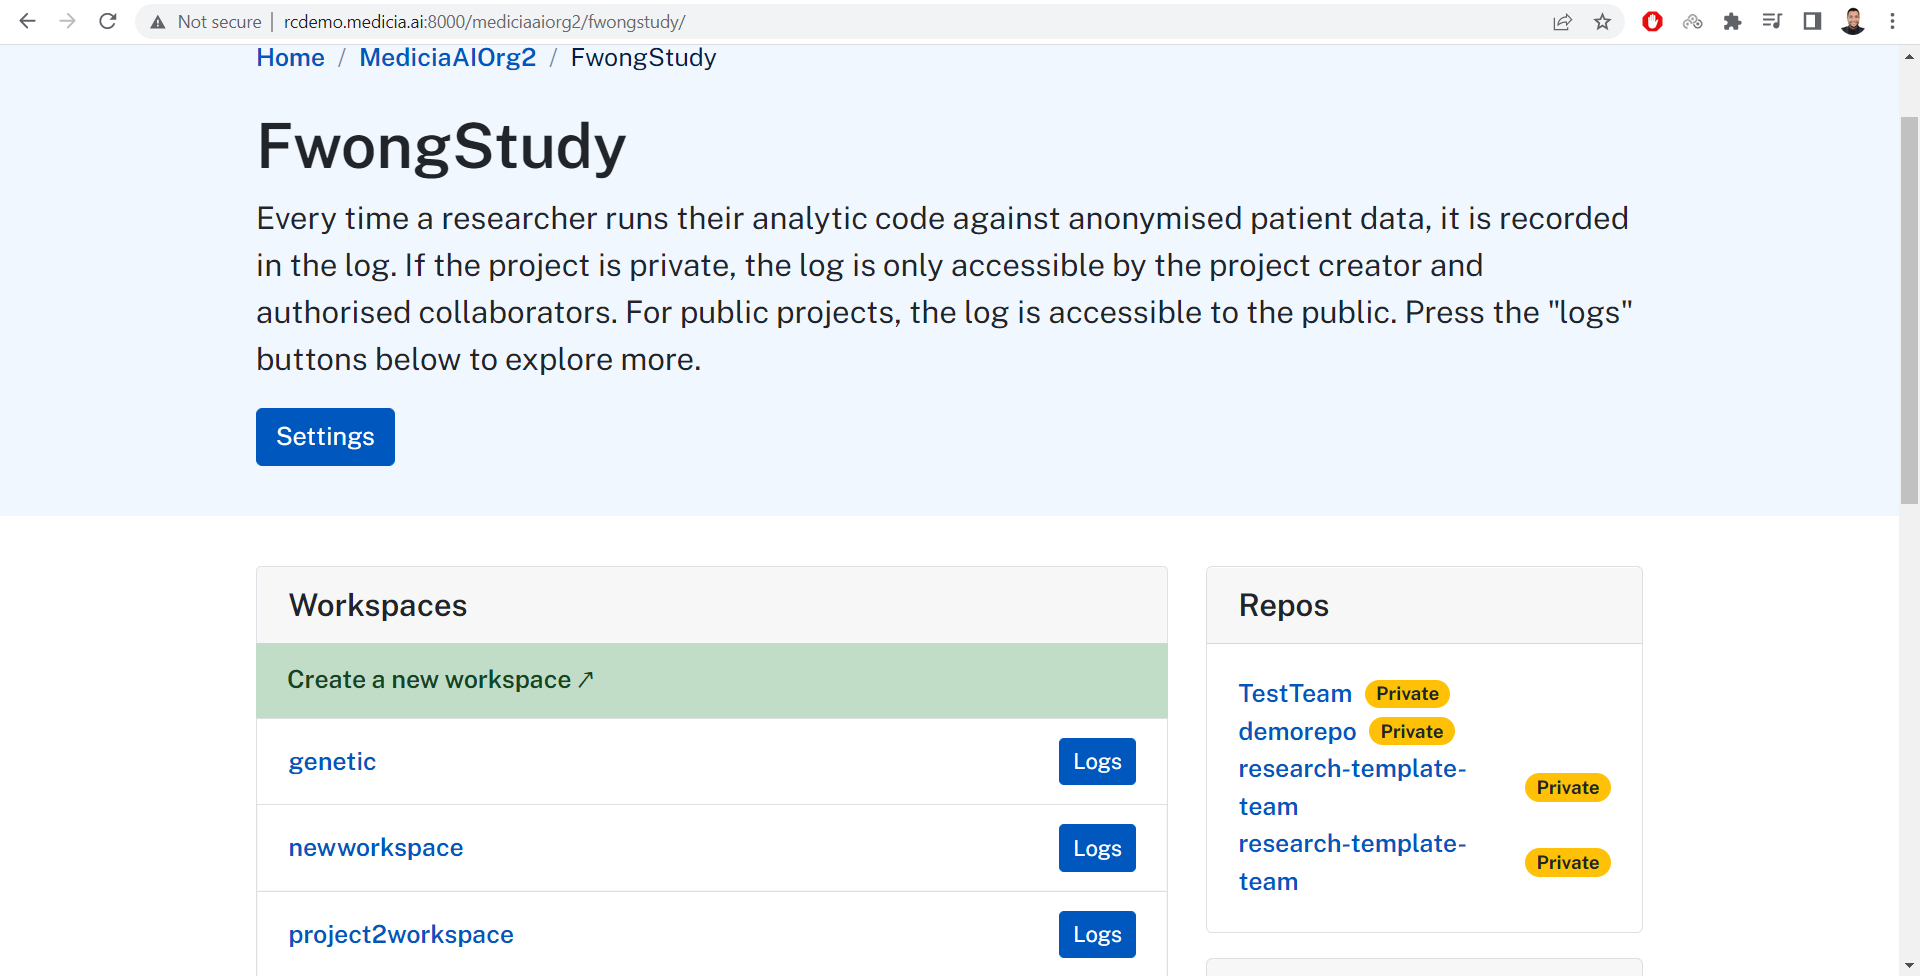
Given that the current user has the Project Coordinator role, then
this user can edit the members. Just click the Settings button which
goes to this page
(https://demo.mediciaresearch.cloud/mediciaaiorg2/MyStudy/settings) as
in the next image. There the user can change the project’s settings
including:
Project name
Editing the members by adding or removing members.
Change the role of the members of the project.

Let’s click the Edit button besides user. This goes to the user’s
page under the MyStudy project. Select which roles to be assigned to
the user and click the Save button.
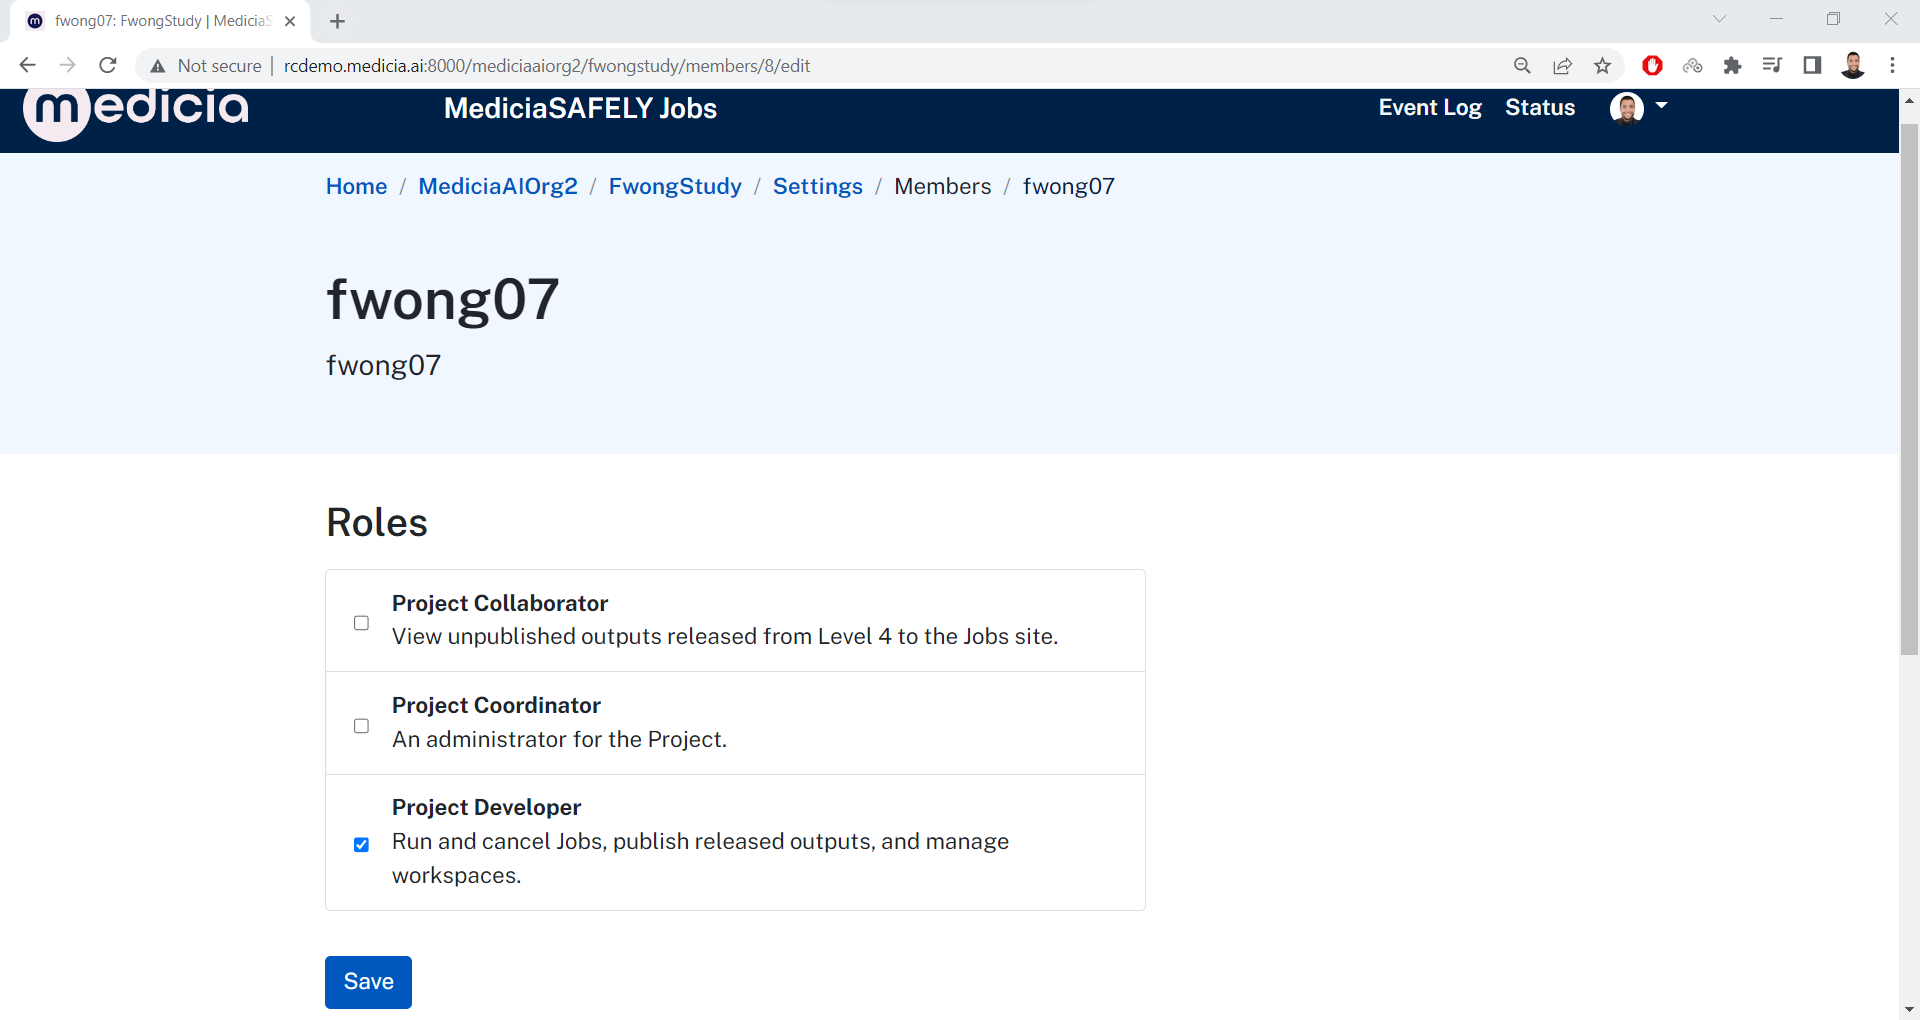
In the project’s settings page, the user can control 3 roles:
Project Collaborator.
Project Coordinator.
project Developer.
These 3 roles only applies to the current project. It may happen that the user is a member of more than 1 project. If the user is assigned a role as described above, then this role is only applied to the current project. But the user will not have this role in the other projects.
To assign the user roles that apply to all project, then contact a MediciaSAFELY admin to assign the user the roles that get applied to all projects.
This is a list of all roles (10) that can be assigned to the users.
Core Developer.
Data Investigator.
Governance Reviewer.
Onboarding Agent.
Output Checker.
Output Publisher.
Project Collaborator.
Project Coordinator.
Project Developer.
Technical Reviewer.
As a summary, there are 3 roles can only work to either individual or all projects. The other roles can work only across all current and future projects.
7. Create Workspace
The regular user can now login with their GitHub account and visit the homepage of MediciaSAFELY: https://demo.mediciaresearch.cloud
Scroll down and click the Add a New Workspace button.

Clicking this button forwards the user to the its organization. For
example, if the user is a member of the mediciaaiorg2 organization,
then it will be forwarded to this page:
https://demo.mediciaresearch.cloud/mediciaaiorg2
Click on the target project. For example, MyStudy
https://demo.mediciaresearch.cloud/mediciaaiorg2/MyStudy. This forwards
to the project’s details page where all project’s workspaces are listed.
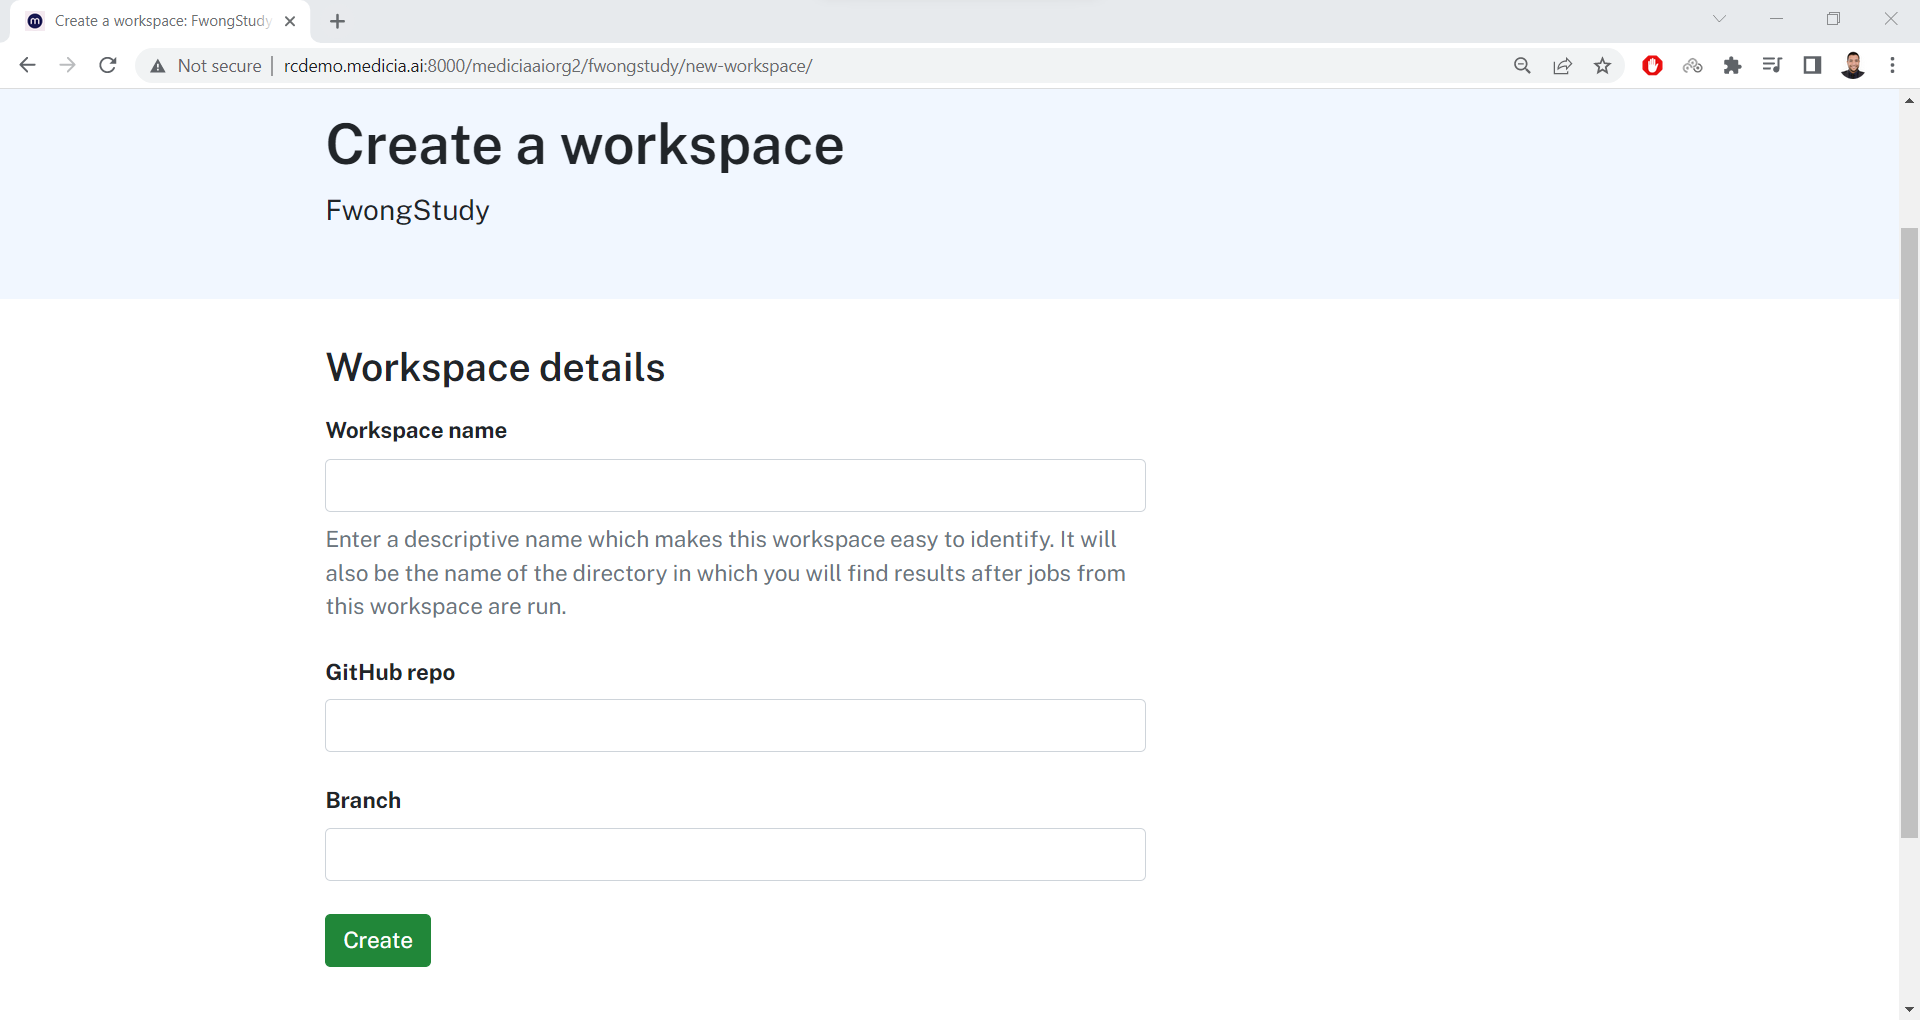
If the user is authorized to create workspaces, then it will find the
Create a new workspace ↗. button there. Click on it:
https://demo.mediciaresearch.cloud/mediciaaiorg2/MyStudy/new-workspace/
The user will be forwarded to a page to create a new workspace. Enter the following information into the workspace form:
Workspace name. This is a name of your choice.
GitHub repository. This is the full URL of the GitHub repository. For example, https://github.com/MediciaAI/TestTeam.
Branch of the repository. For example,
main.
Then click the Create button.
After the workspace is created, then go back to the project page where you will find the new workspace listed: https://demo.mediciaresearch.cloud/mediciaaiorg2/MyStudy
Then click the created workspace: https://demo.mediciaresearch.cloud/mediciaaiorg2/MyStudy/project2workspace
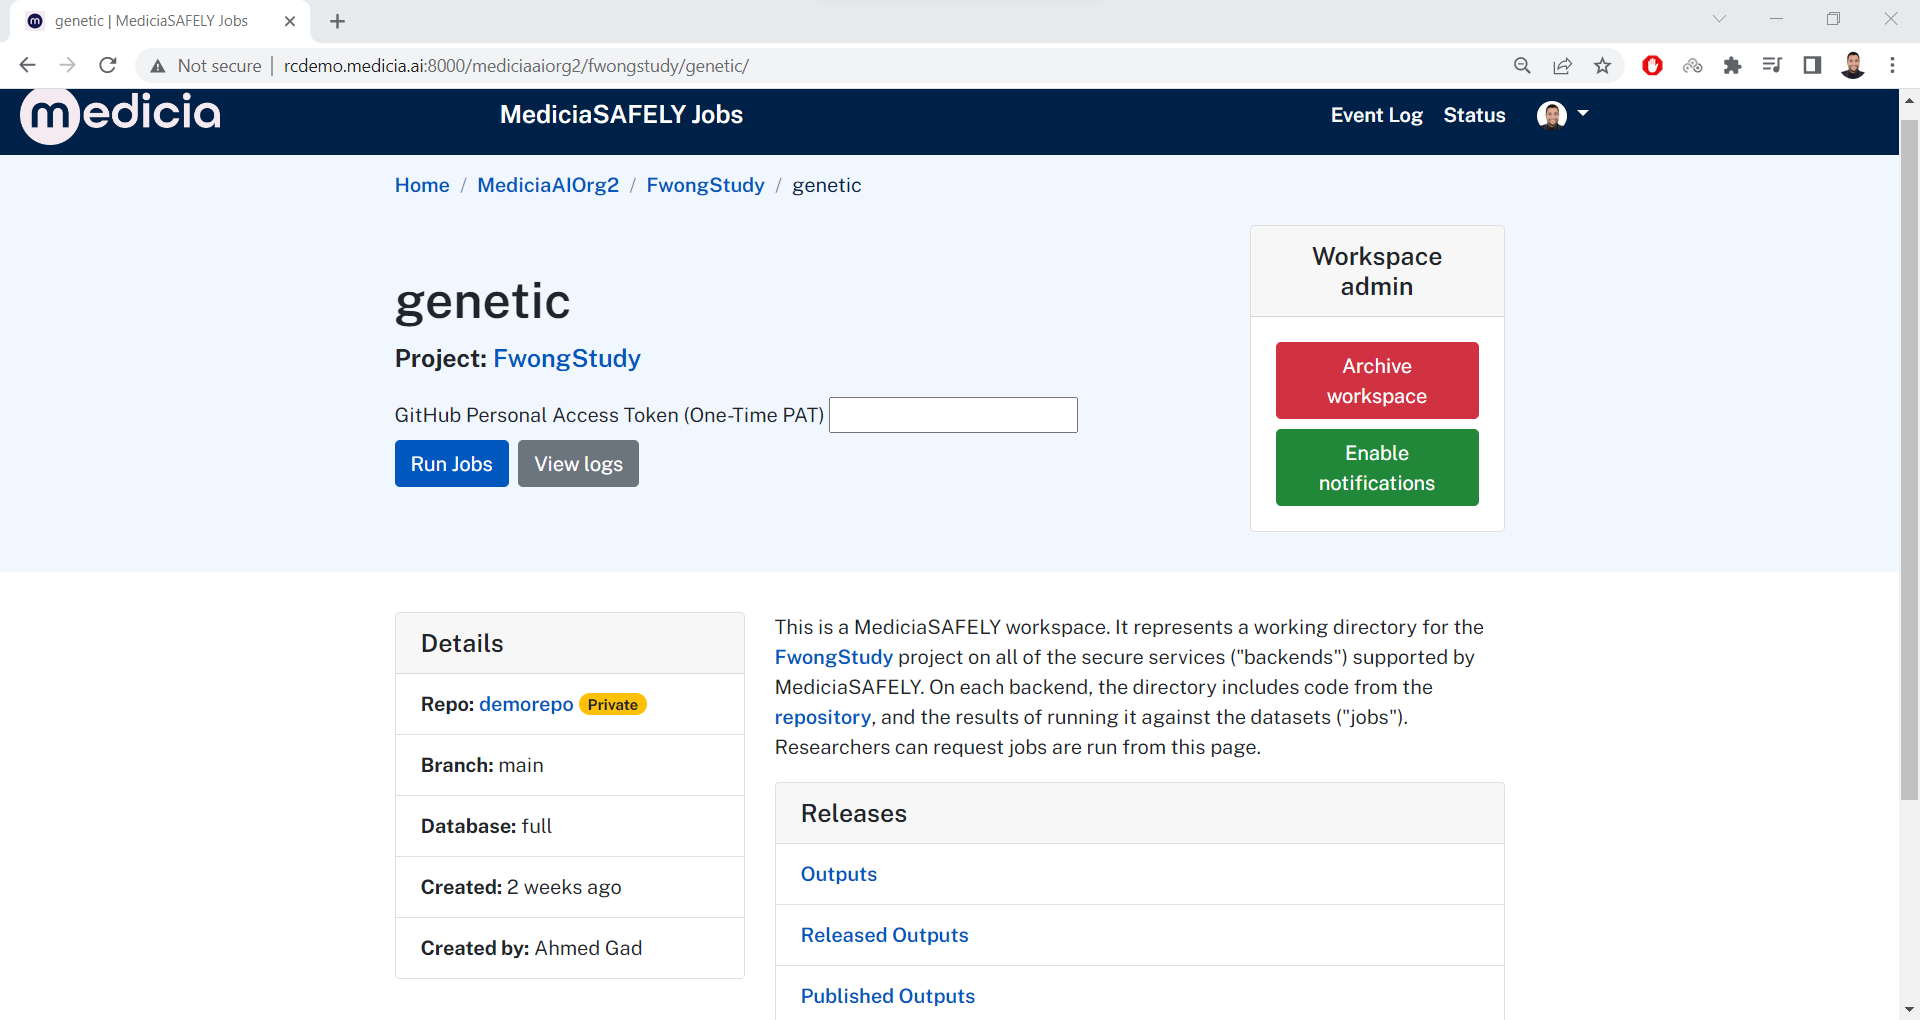
Email notifications are not enabled by default. To get notifications
about all the jobs in this workspace, click on the
Enable notifications button. Now, the button text becomes
Disable notifications.
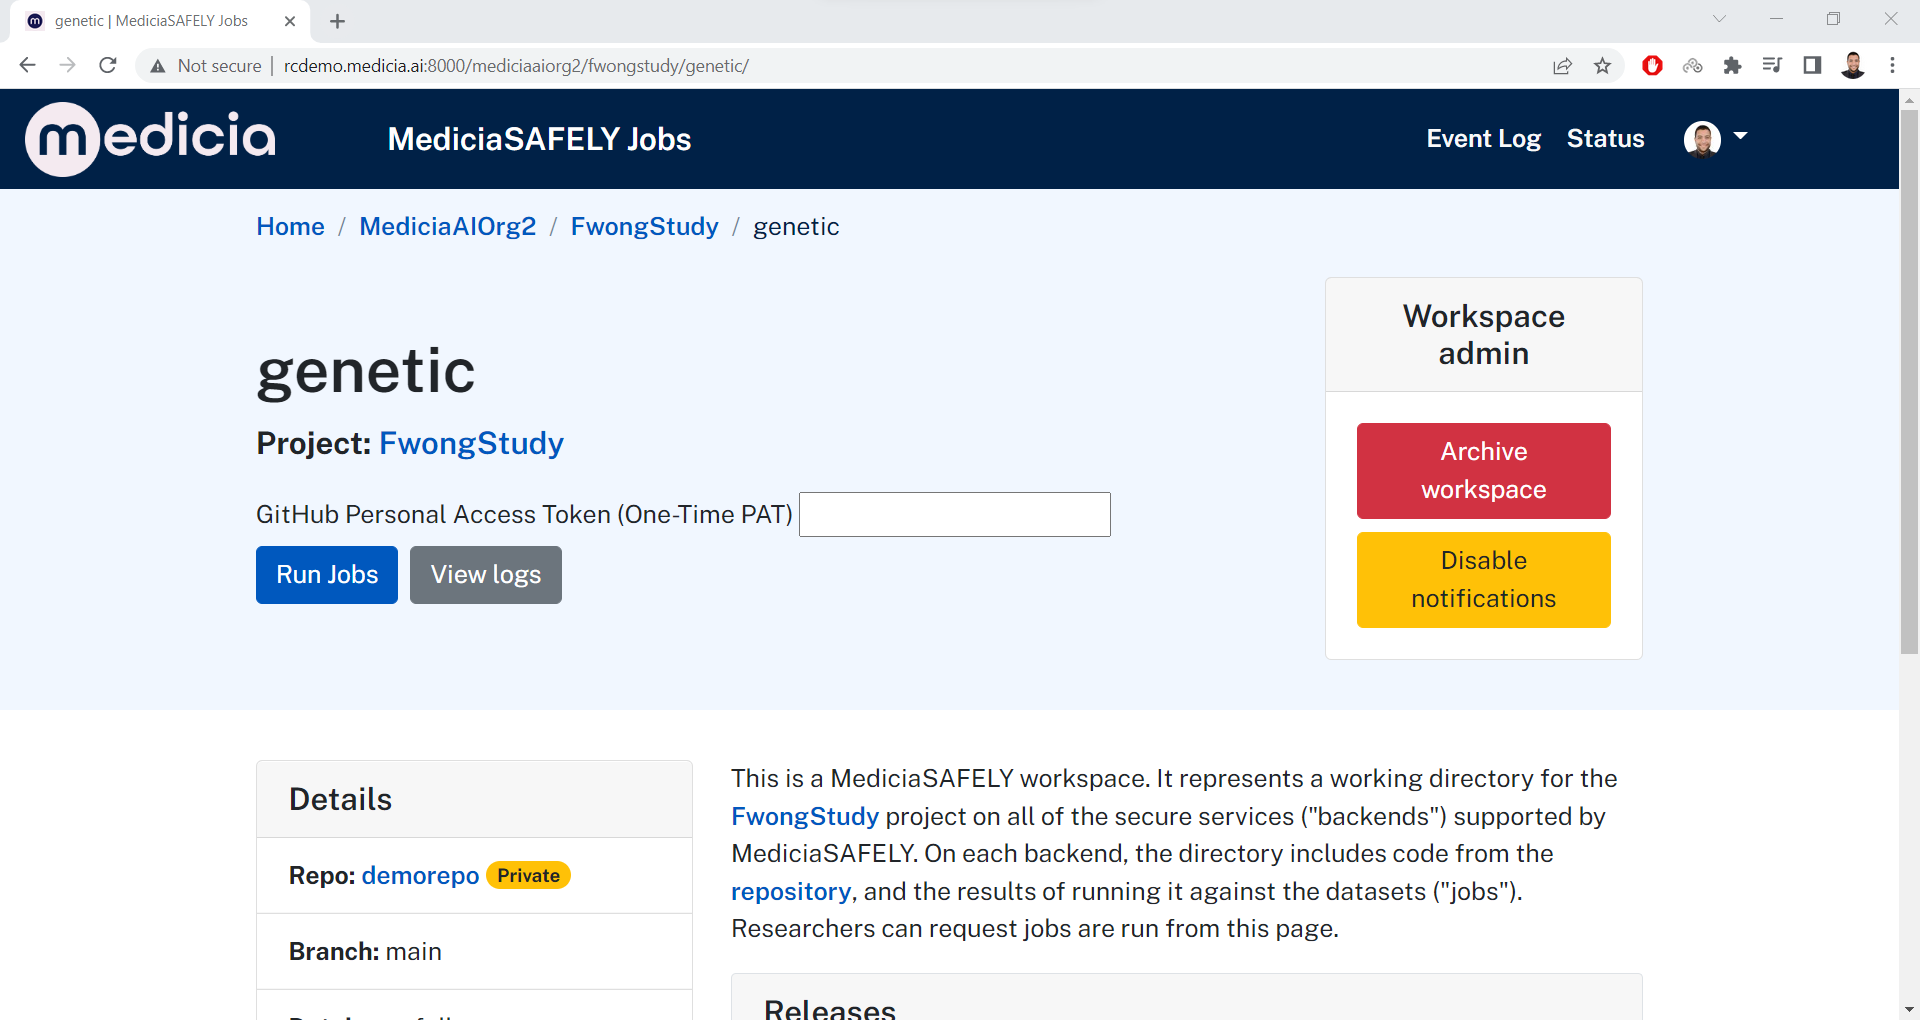
To archive the workspace, click the Archive workspace button.
8. Enter the GitHub PAT
To grant the server access to the GitHub repository, you must provide the GitHub personal access token (PAT). There are 2 ways to give the PAT to the server:
- Through the user’s settings page. There is an input field to accept the PAT. After clicking the
Savebutton, the PAT will be saved permanently to the database. In this case, the user enters the PAT only once and use it many times.The user can also change the email address to which notifications are sent.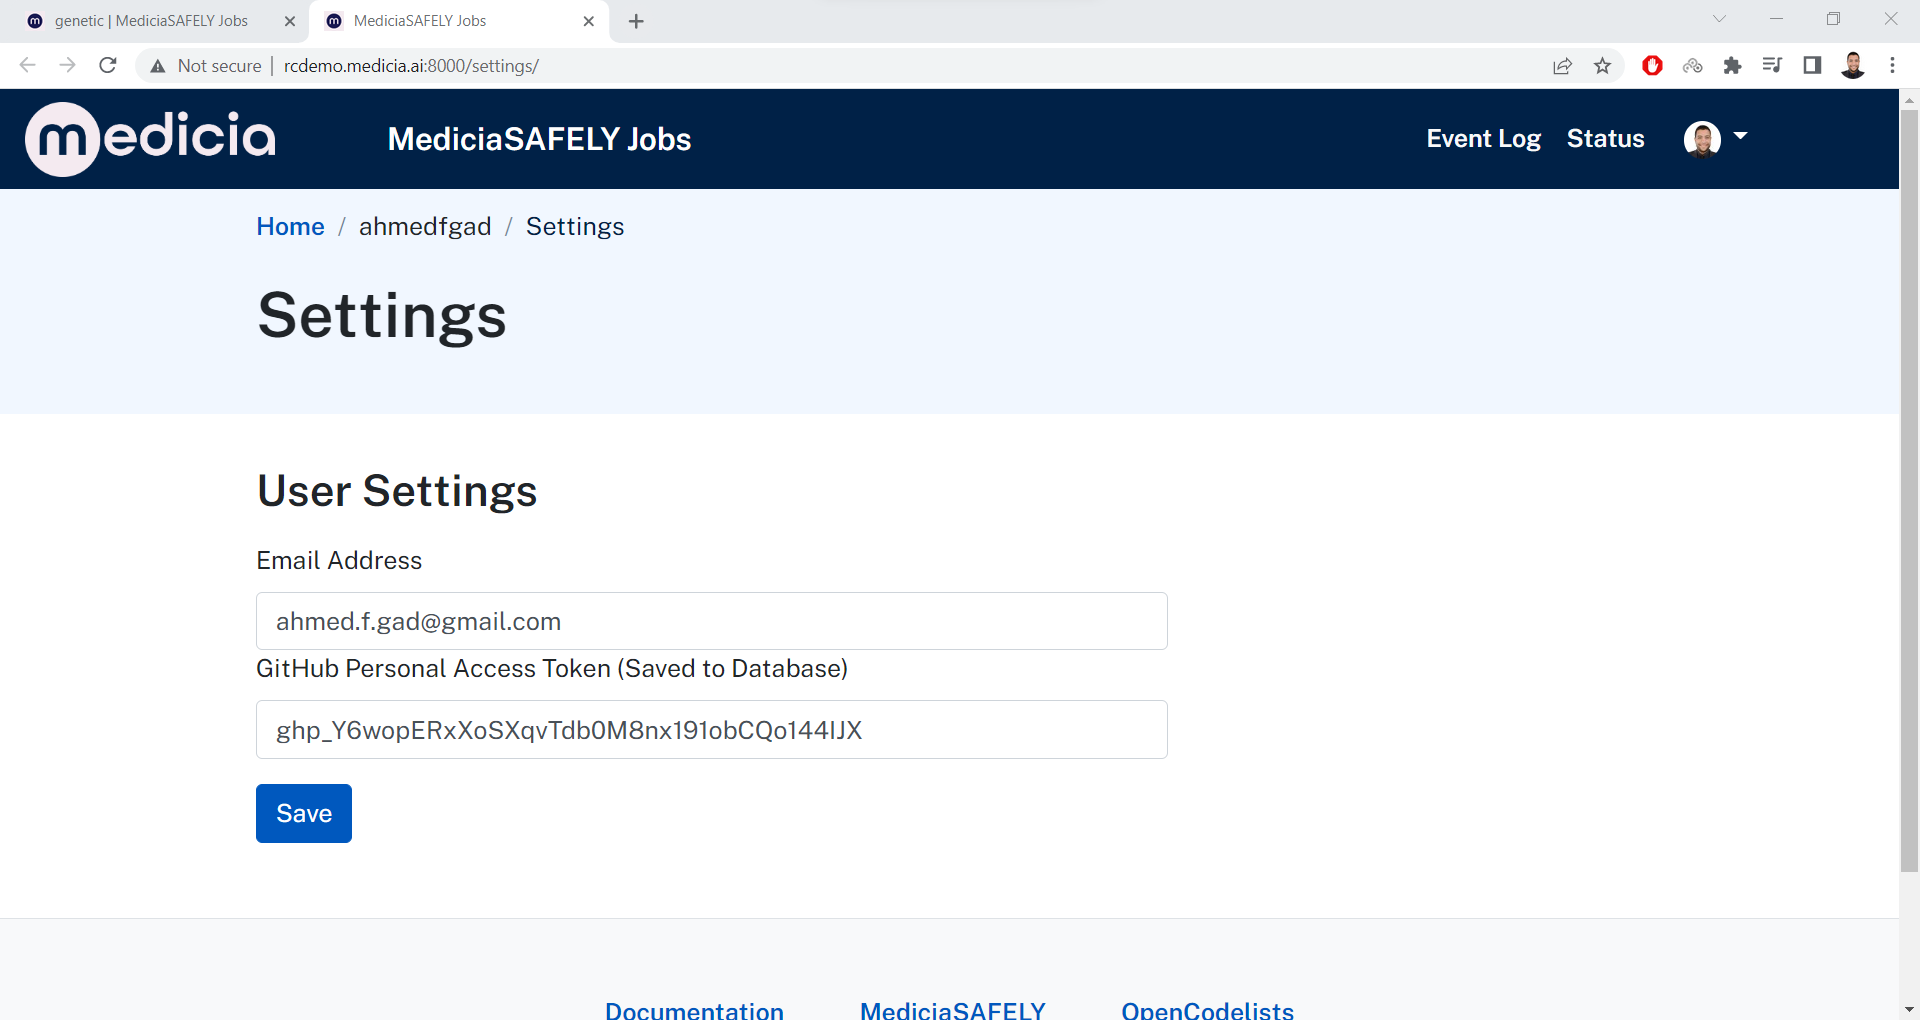
- If the user prefers not to keep the PAT stored in the database, then it can enter it in the workspace details page. There is an input field that accepts the PAT. This PAT is used only once and not saved in the database. But the user have to enter the PAT before running jobs.
As a summary, if the PAT is not saved in the database, then the user have to enter it each time a job is to be run.
9. Run Jobs
Once the PAT is given, then the user can click the Run Jobs button
in the workspace page. For example,
https://demo.mediciaresearch.cloud/mediciaaiorg2/MyStudy/project2workspace.
This opens this page
(https://demo.mediciaresearch.cloud/mediciaaiorg2/MyStudy/project2workspace/run-jobs/)
which lists all the actions in the project according to the
project.yaml file in the GitHub repository.
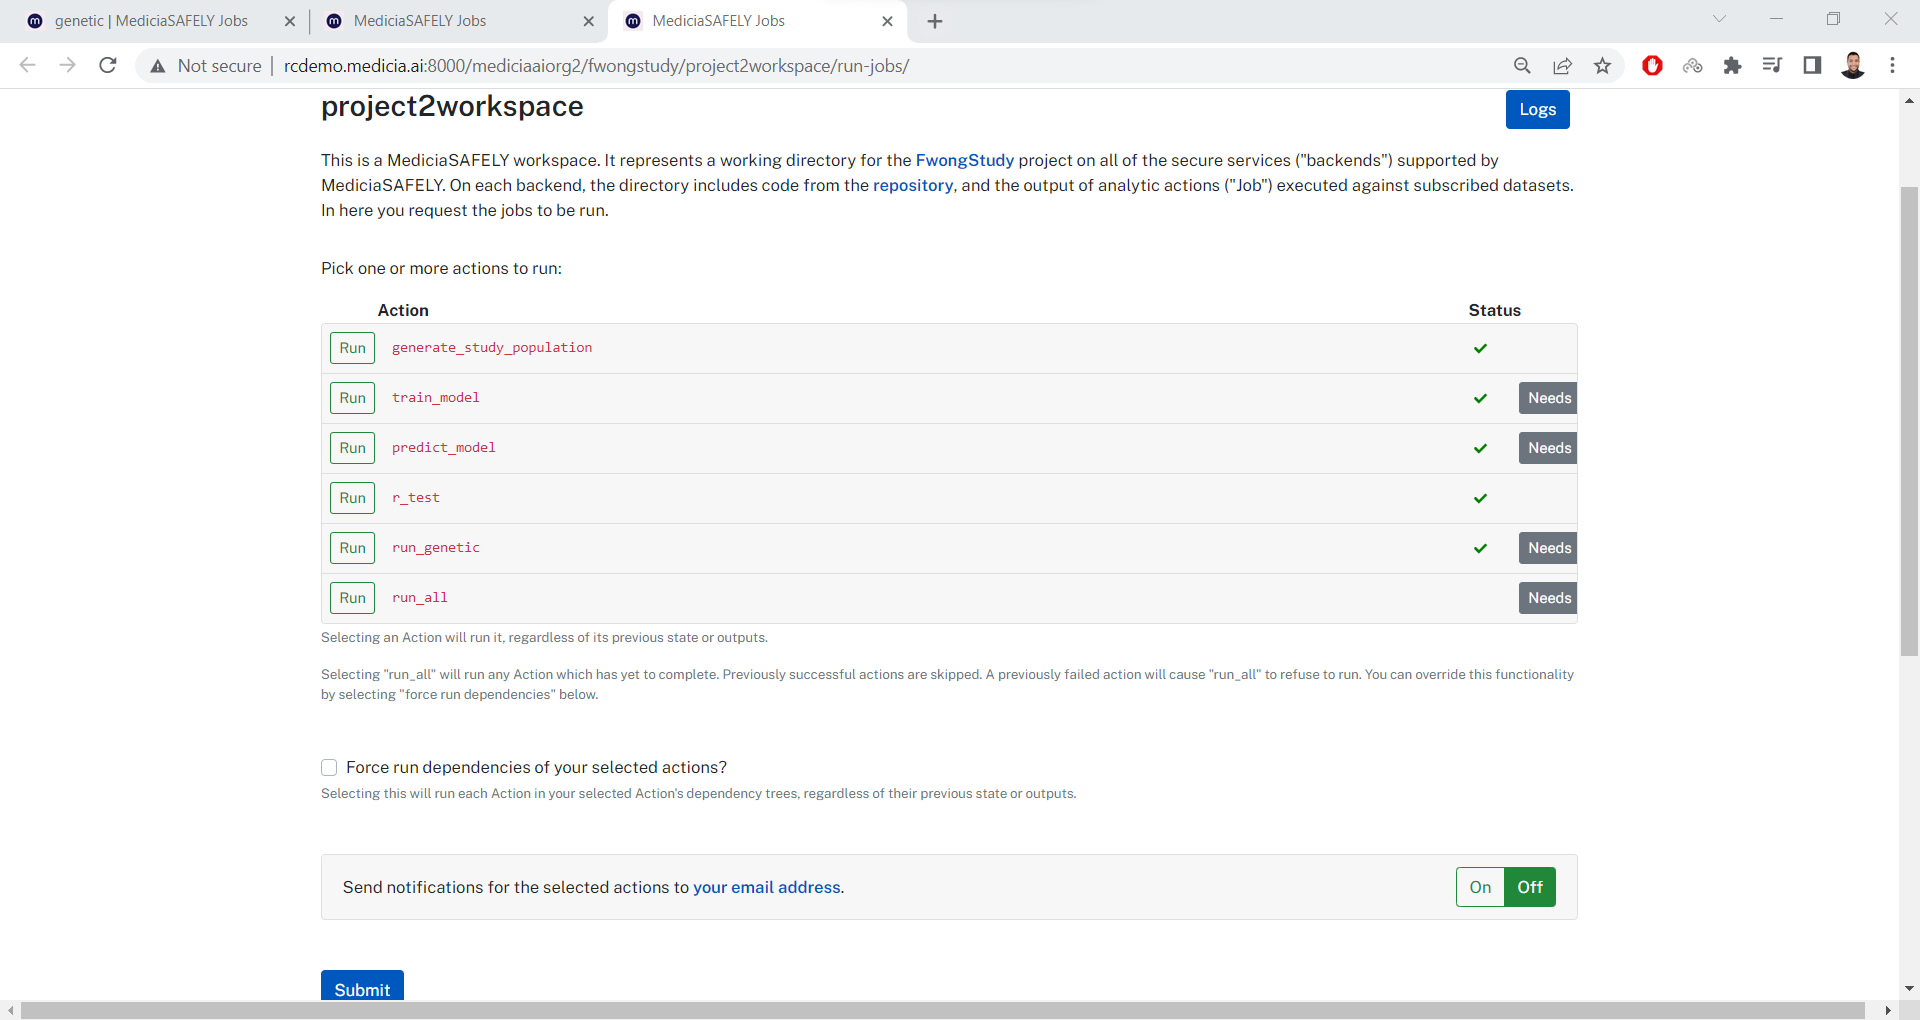
Click the Run button at the left side of the actions you would like
to run. These buttons should be turned into green.
Check whether notifications should be sent to the email once each job is completed and change the state of the checkbox.
Then click Submit. Now, the jobs will be submitted from the job
server to the job runner to be executed.
To check the status of the submitted jobs, go to the workspace logs page. For example, https://demo.mediciaresearch.cloud/mediciaaiorg2/MyStudy/project2workspace/logs/?next=/gad. A job is successfully completed if a green mark is shown.
10. View Results
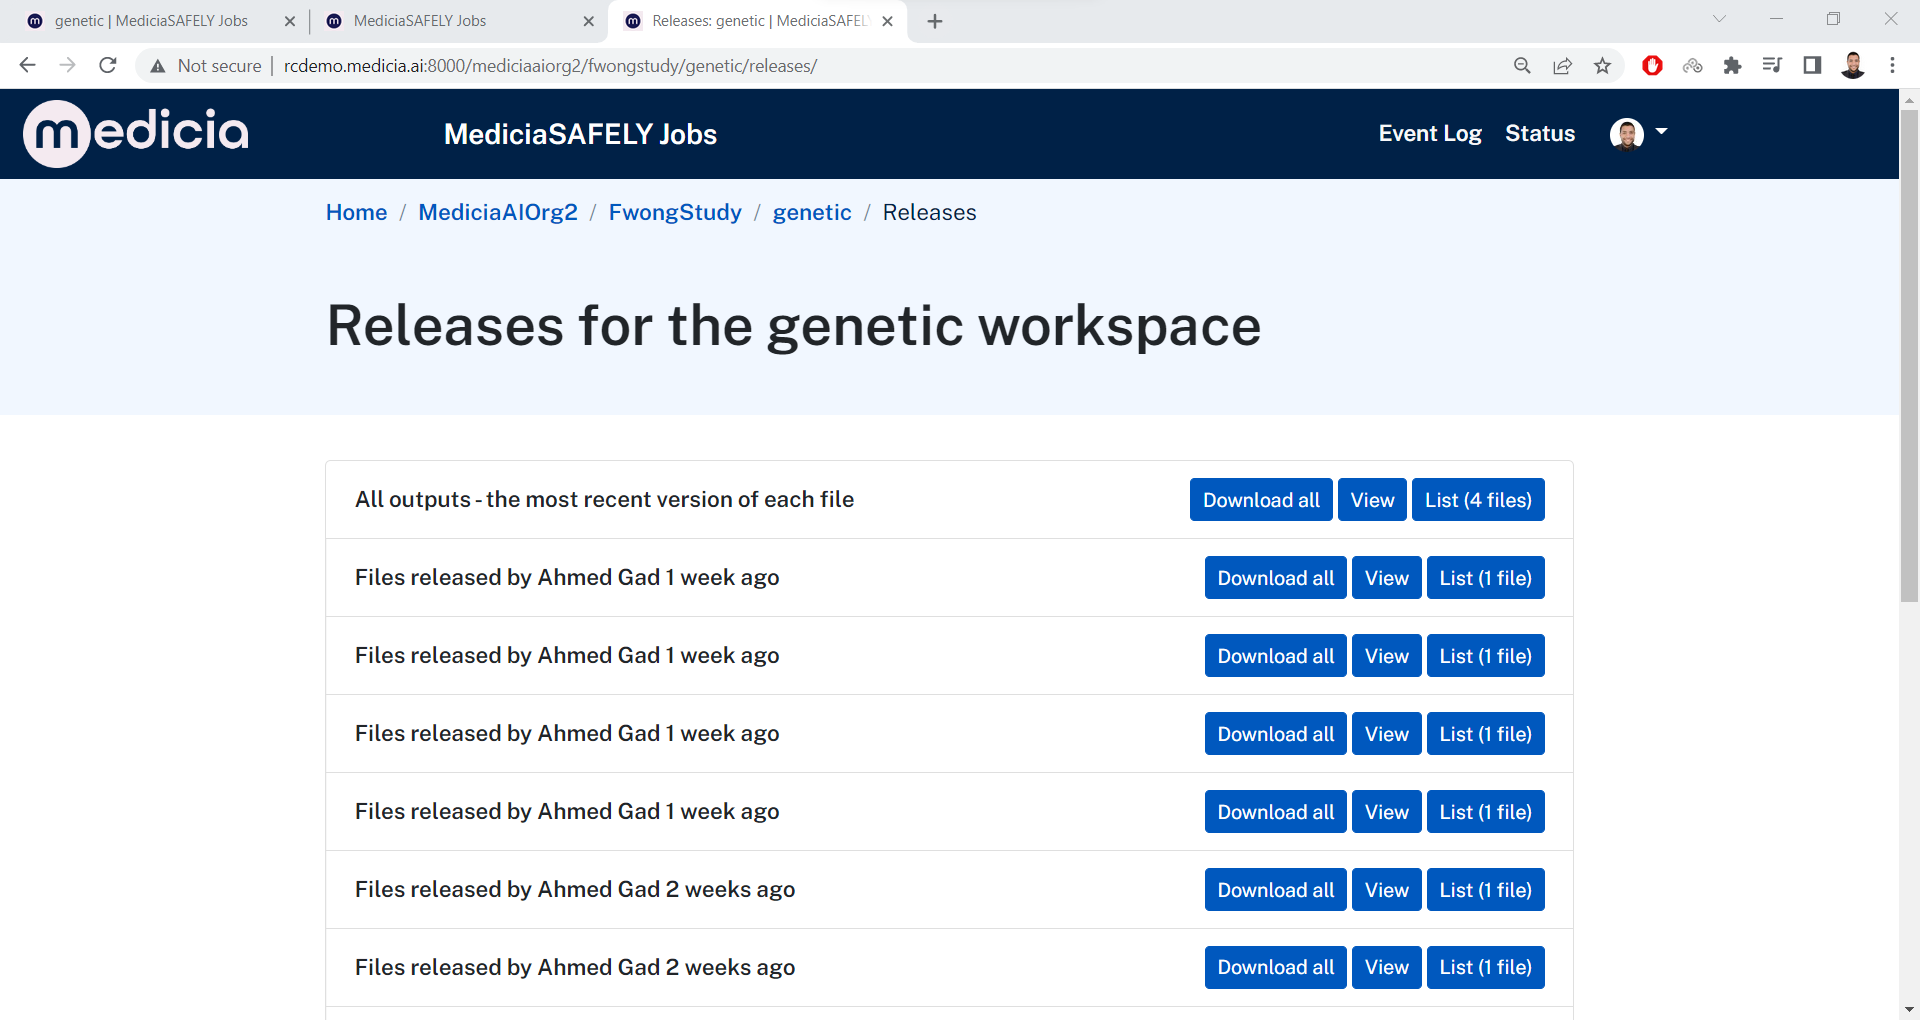
Once the jobs are completed successfully, go back to the workspace page.
Under the Releases section, click the Released Outputs page.
There you will find the list of released files out of the completed
jobs.
For example, this is the list of outputs in the genetic workspace:
https://demo.mediciaresearch.cloud/mediciaaiorg2/MyStudy/genetic/releases.
You can view the released outputs online or download them.
List the Released Files
The first row in the workspace releases has the most recent versions of
all the released files in the workspace. Clicking on the List button
lists all the released files.
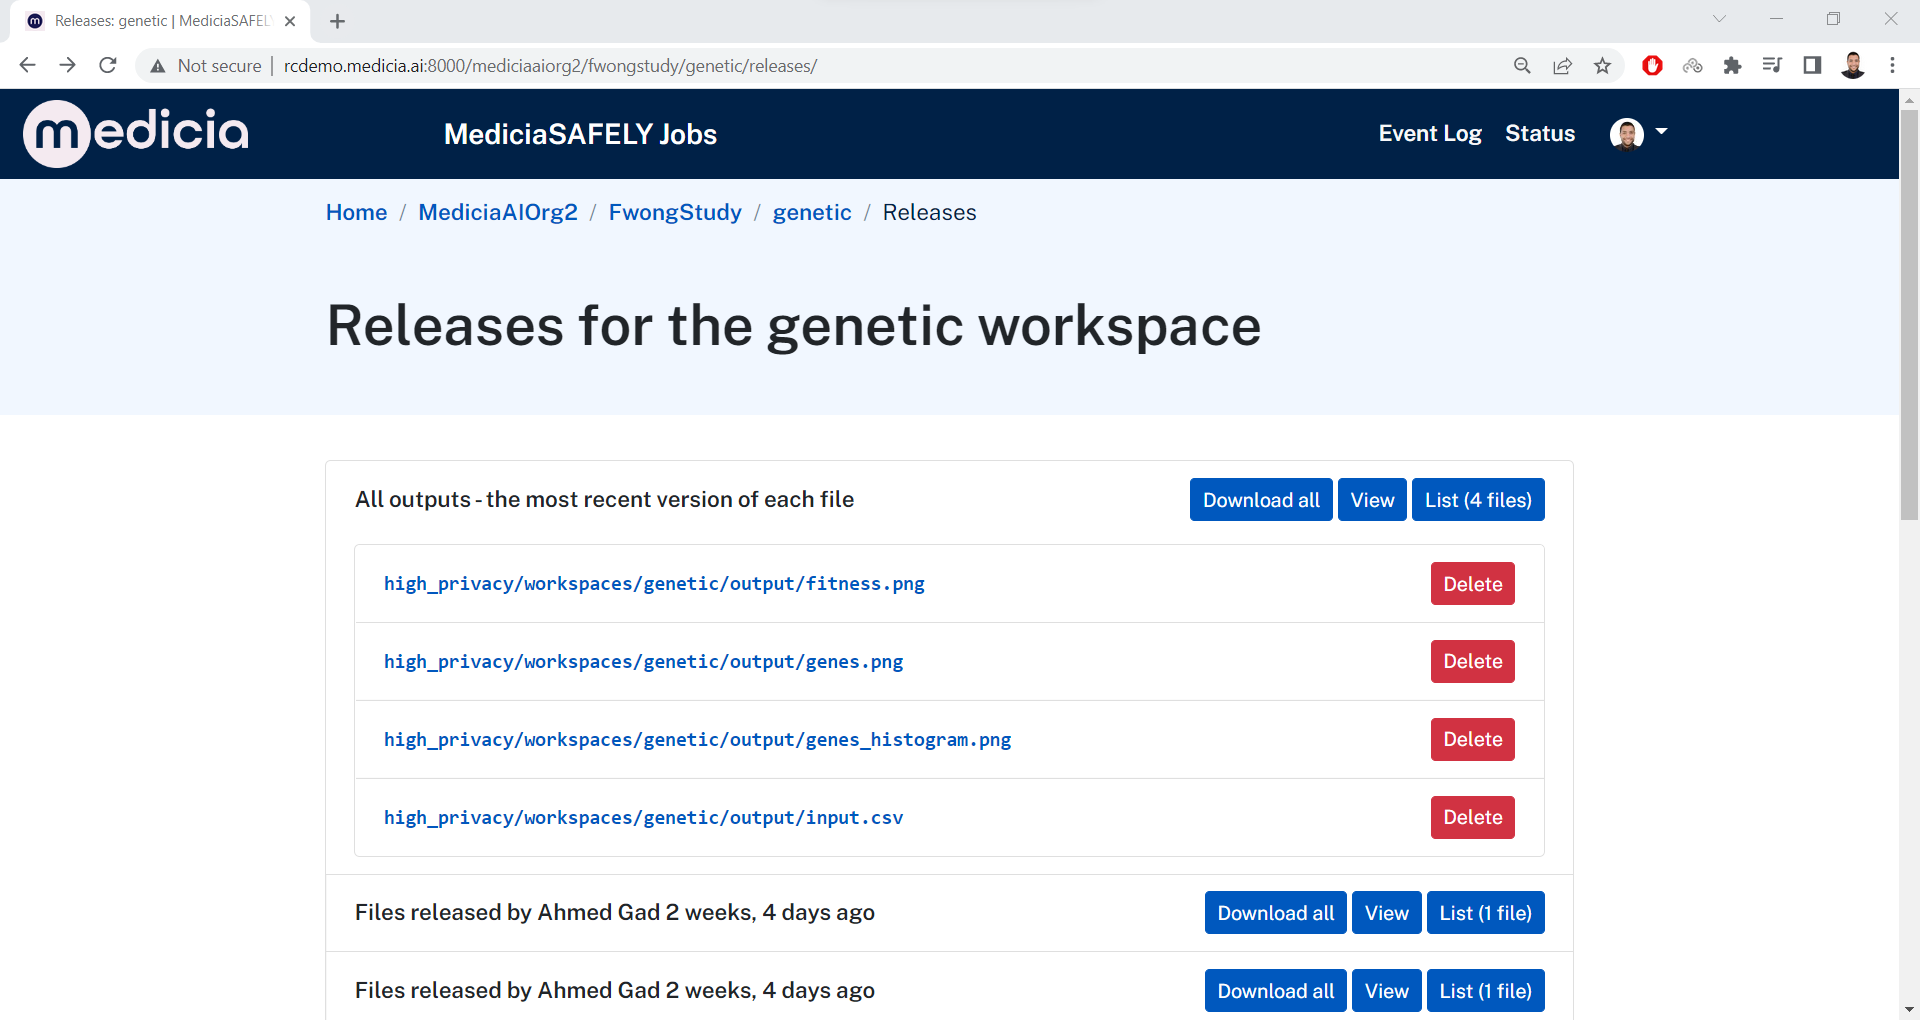
By clicking the List button in the other rows, it only shows the
individual file in this release.
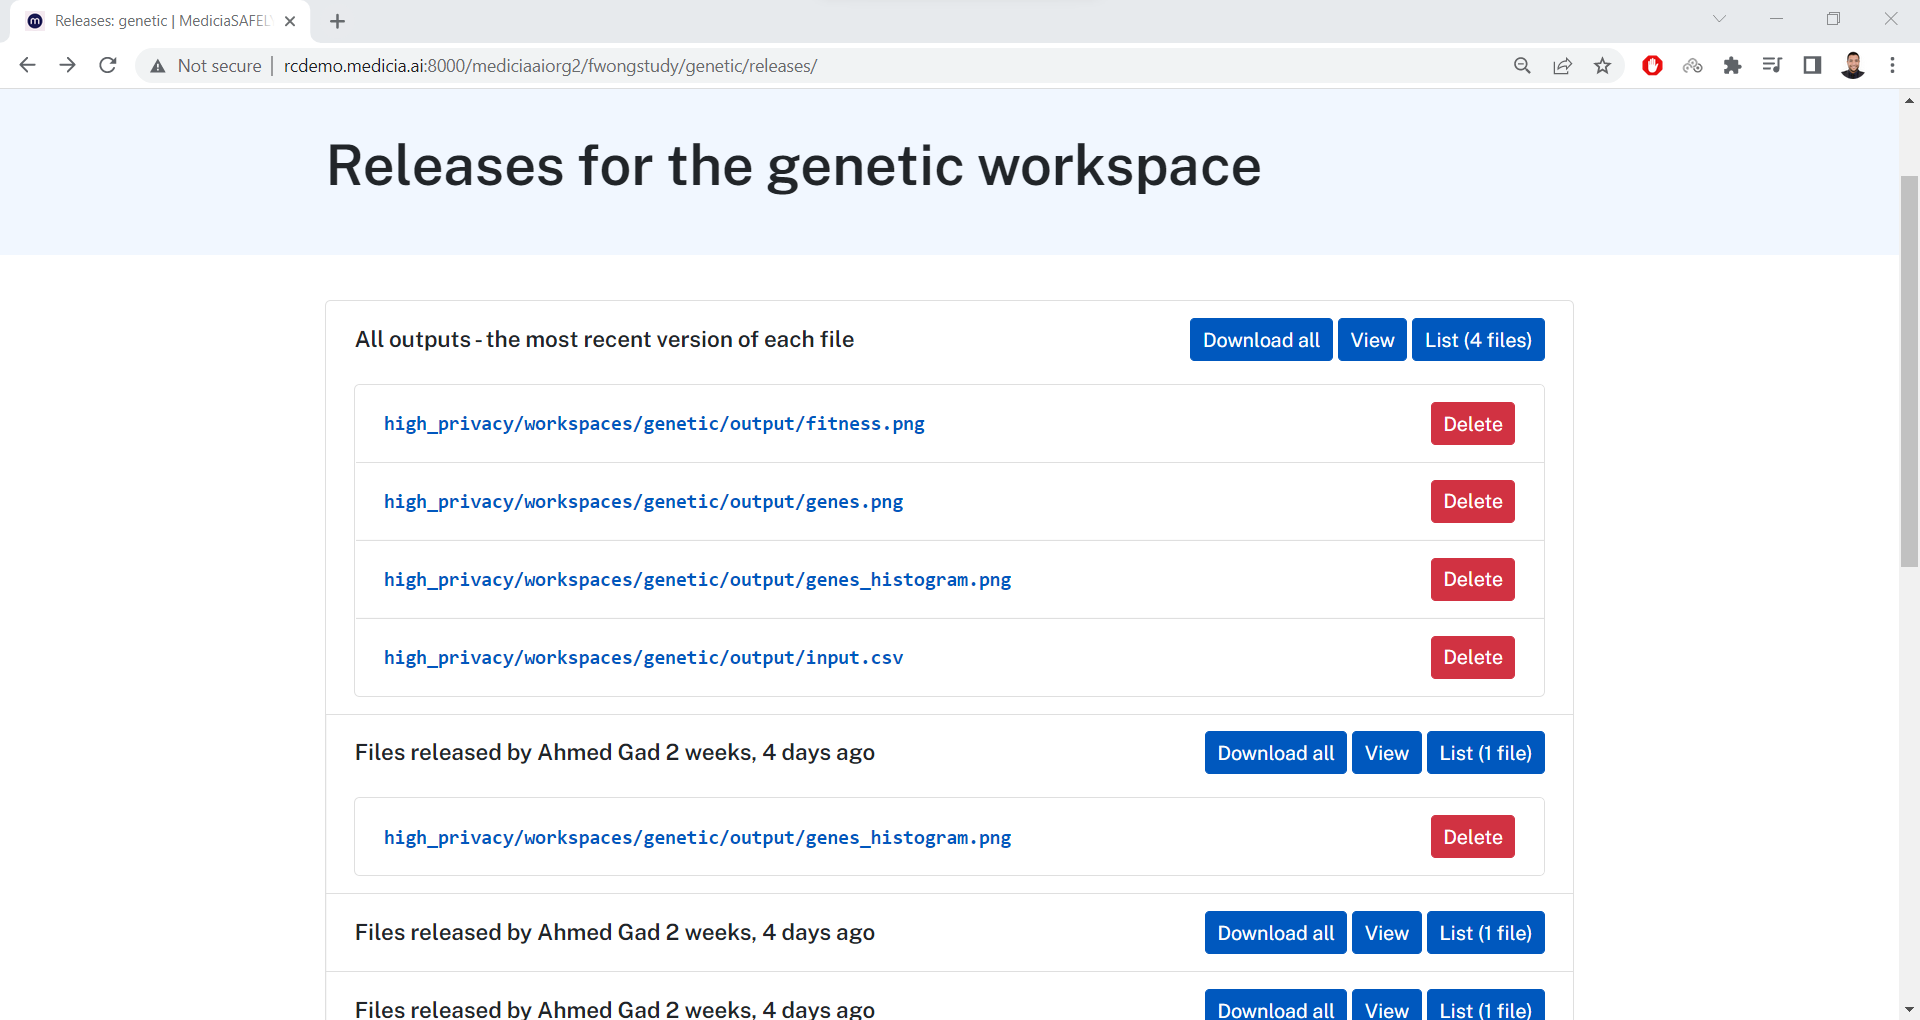
Click the Delete button besides each file to delete it from the
workspace.
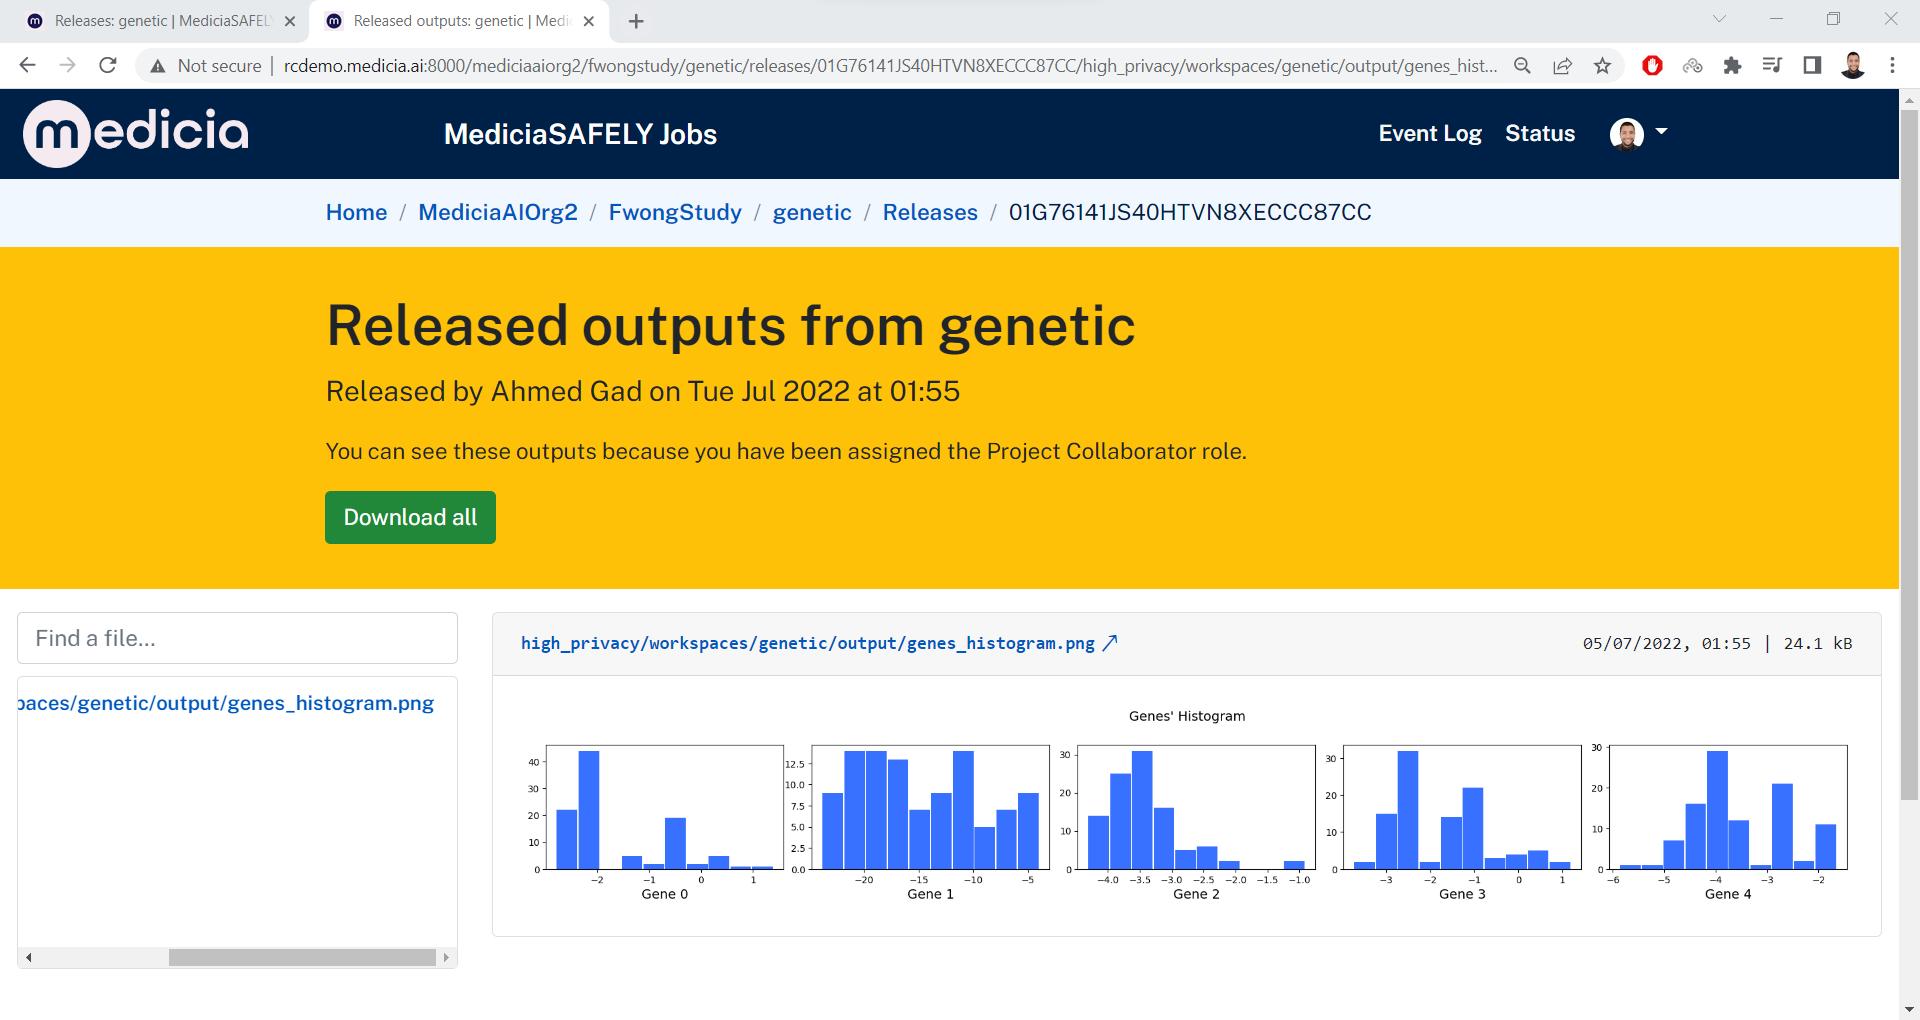
View the Released Files
Click on the View button besides each release to go to the release
page. This is an example. The URL for this release is
https://demo.mediciaresearch.cloud/mediciaaiorg2/MyStudy/genetic/releases/01G76141JS40HTVN8XECCC87CC.
The code at the end of the URL 01G76141JS40HTVN8XECCC87CC represents
the release ID.
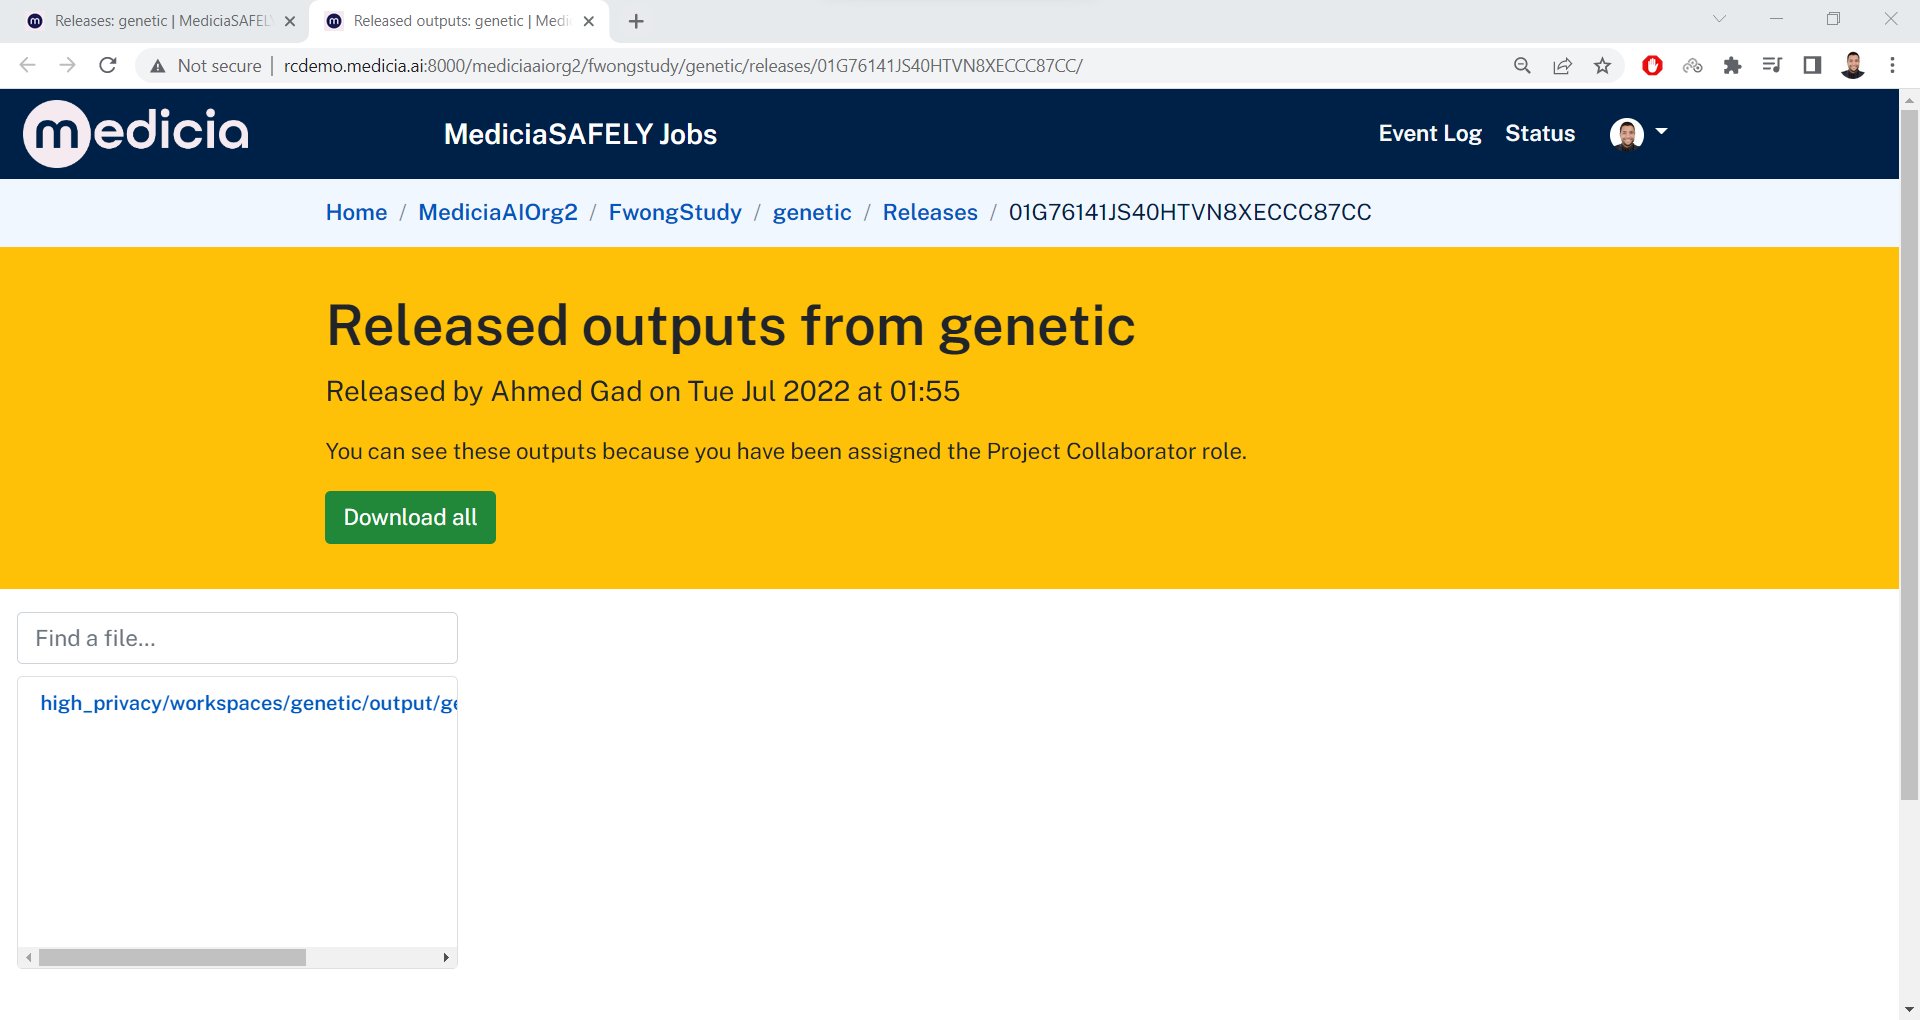
At the bottom-left side, there will be a list of files in this release.
This release has a single file named
high_privacy/workspaces/genetic/output/genes_histogram.png. Its URL
is
https://demo.mediciaresearch.cloud/api/v2/releases/file/01G76142EVABYX5HC8JDJQ1FP2.
The code at the end of the URL 01G76142EVABYX5HC8JDJQ1FP2 represents
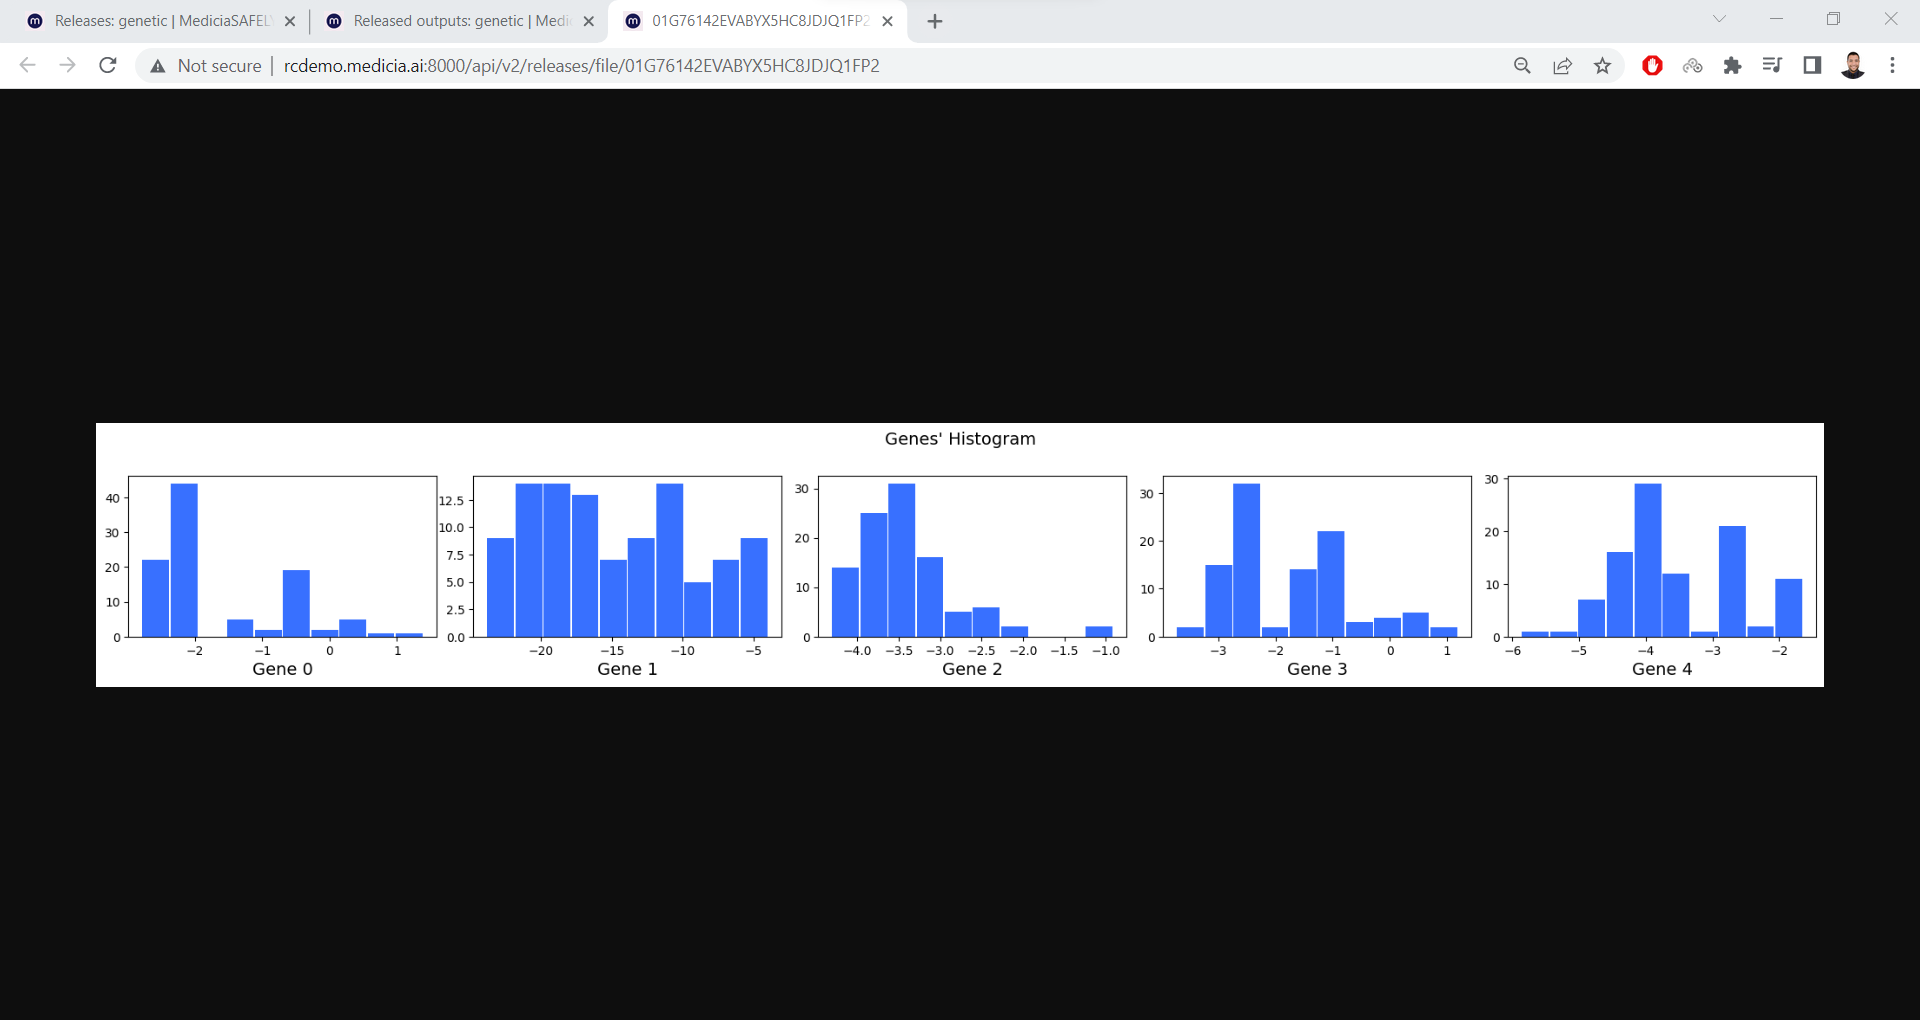
the file ID. Click on the file to view it at the bottom-right area.
To view the file in a new tab, just click the link above it.
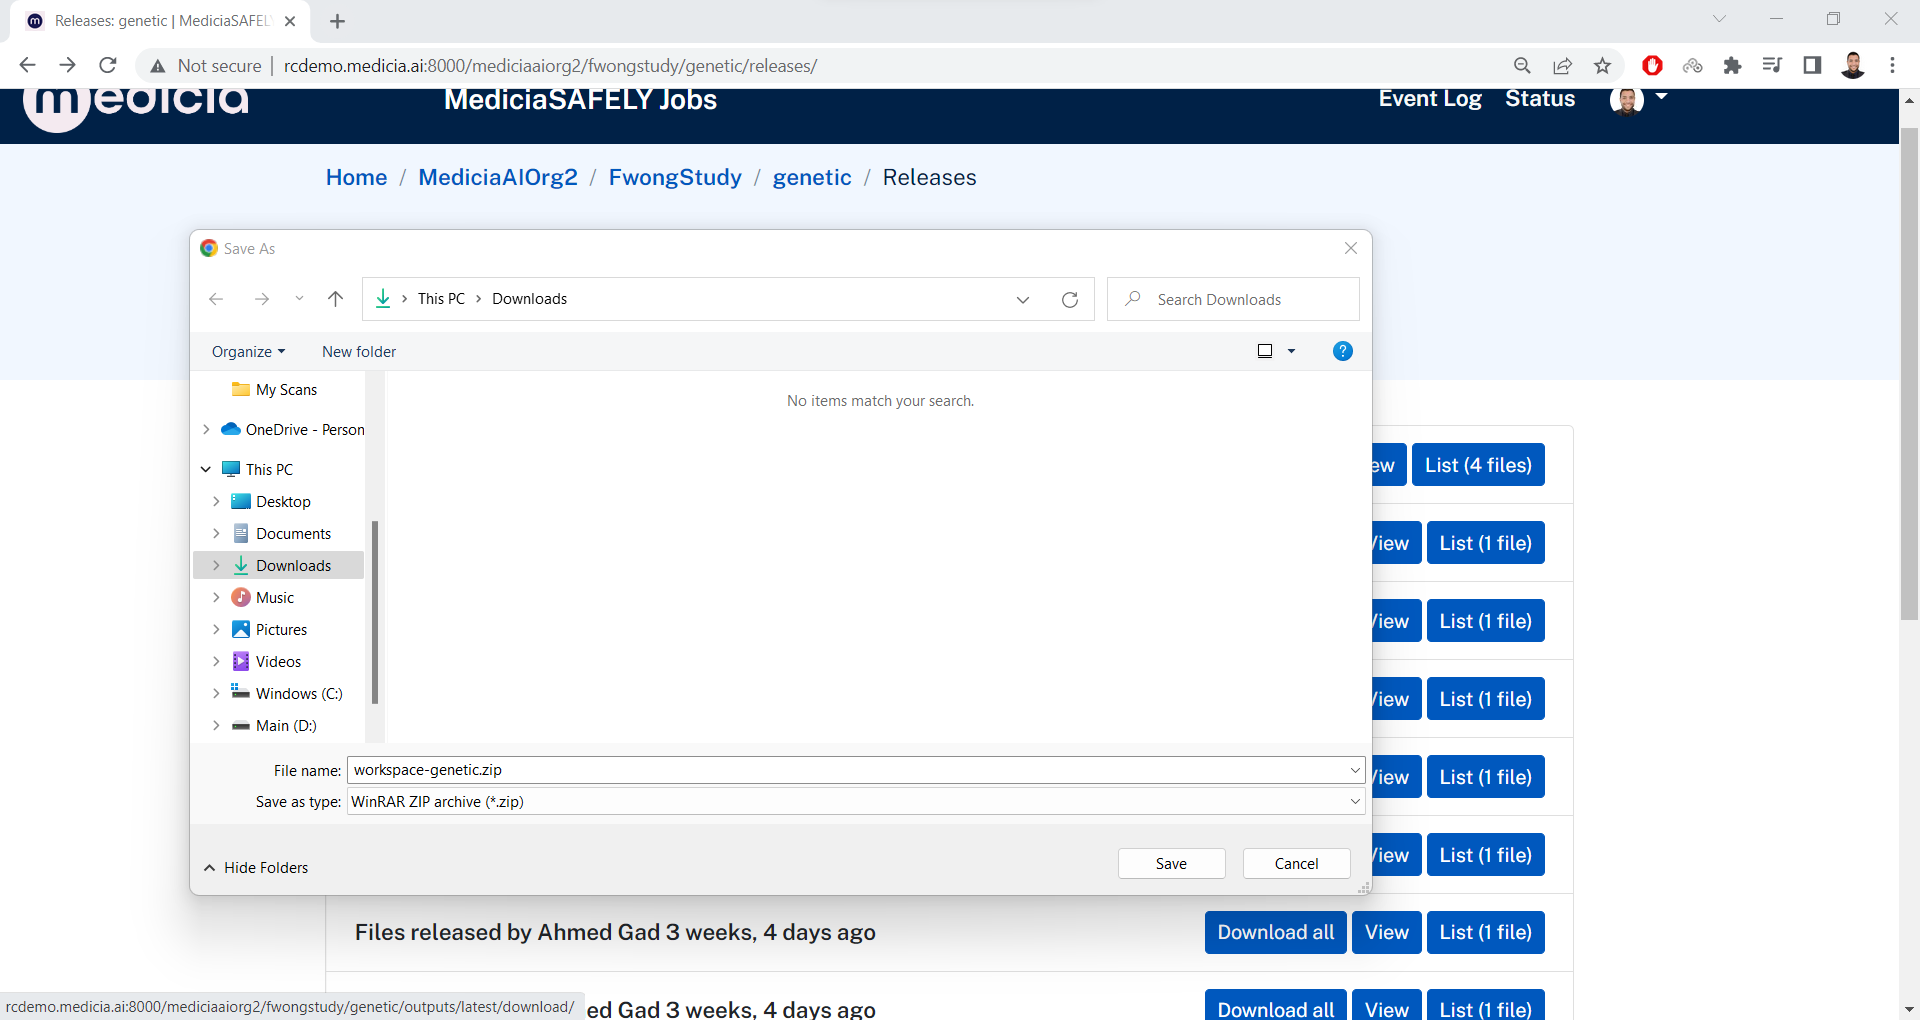
Download the Released Files
In the workspace releases page, click the Download all button to
download all the files in a release.
After clicking the Download all button, then all the files in the
release will be added to a compressed file and you will be asked to
choose the location to save it.
Once downloaded, just decompress the file. Follow the chain of folders
until you open the output folder where the files exist. Then open
the files locally on your machine.
We can also download a specific file by clicking on the View button.
There will be a Download all button to download the files in this
release.
Event Log
At the top-right corner, click the Event Log link to view the logs.
This page shows the logs of all the jobs across all workspaces. Each row
in the table shows the following information:
The workspace name.
The backend name.
The number of jobs to be executed.
The requested action selected by the user. The actions are defined in the
project.yamlfile of the research study.The time at which the job started.
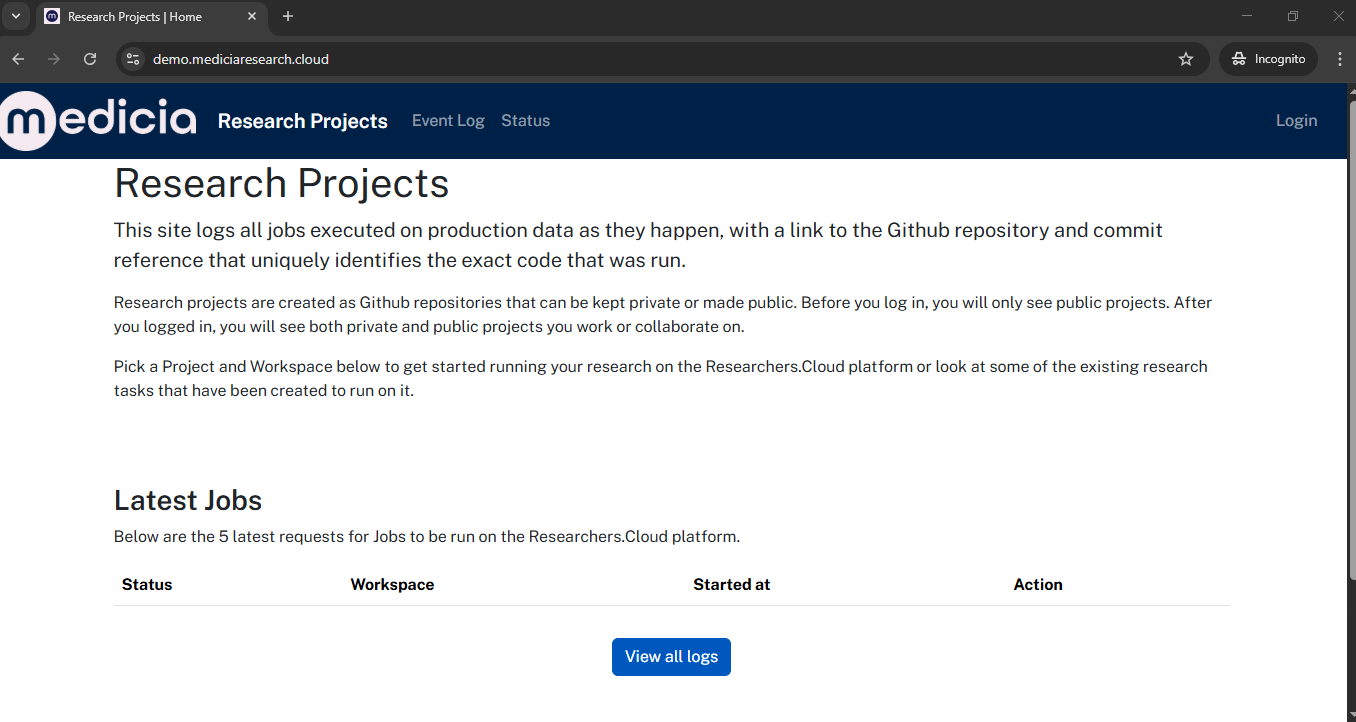
We can access this page also from the the homepage of the server
(https://demo.mediciaresearch.cloud). As in the next image, there is a
list of the latest 5 job requests across all workspaces of the user.
Below the list, there is a button named View all logs.
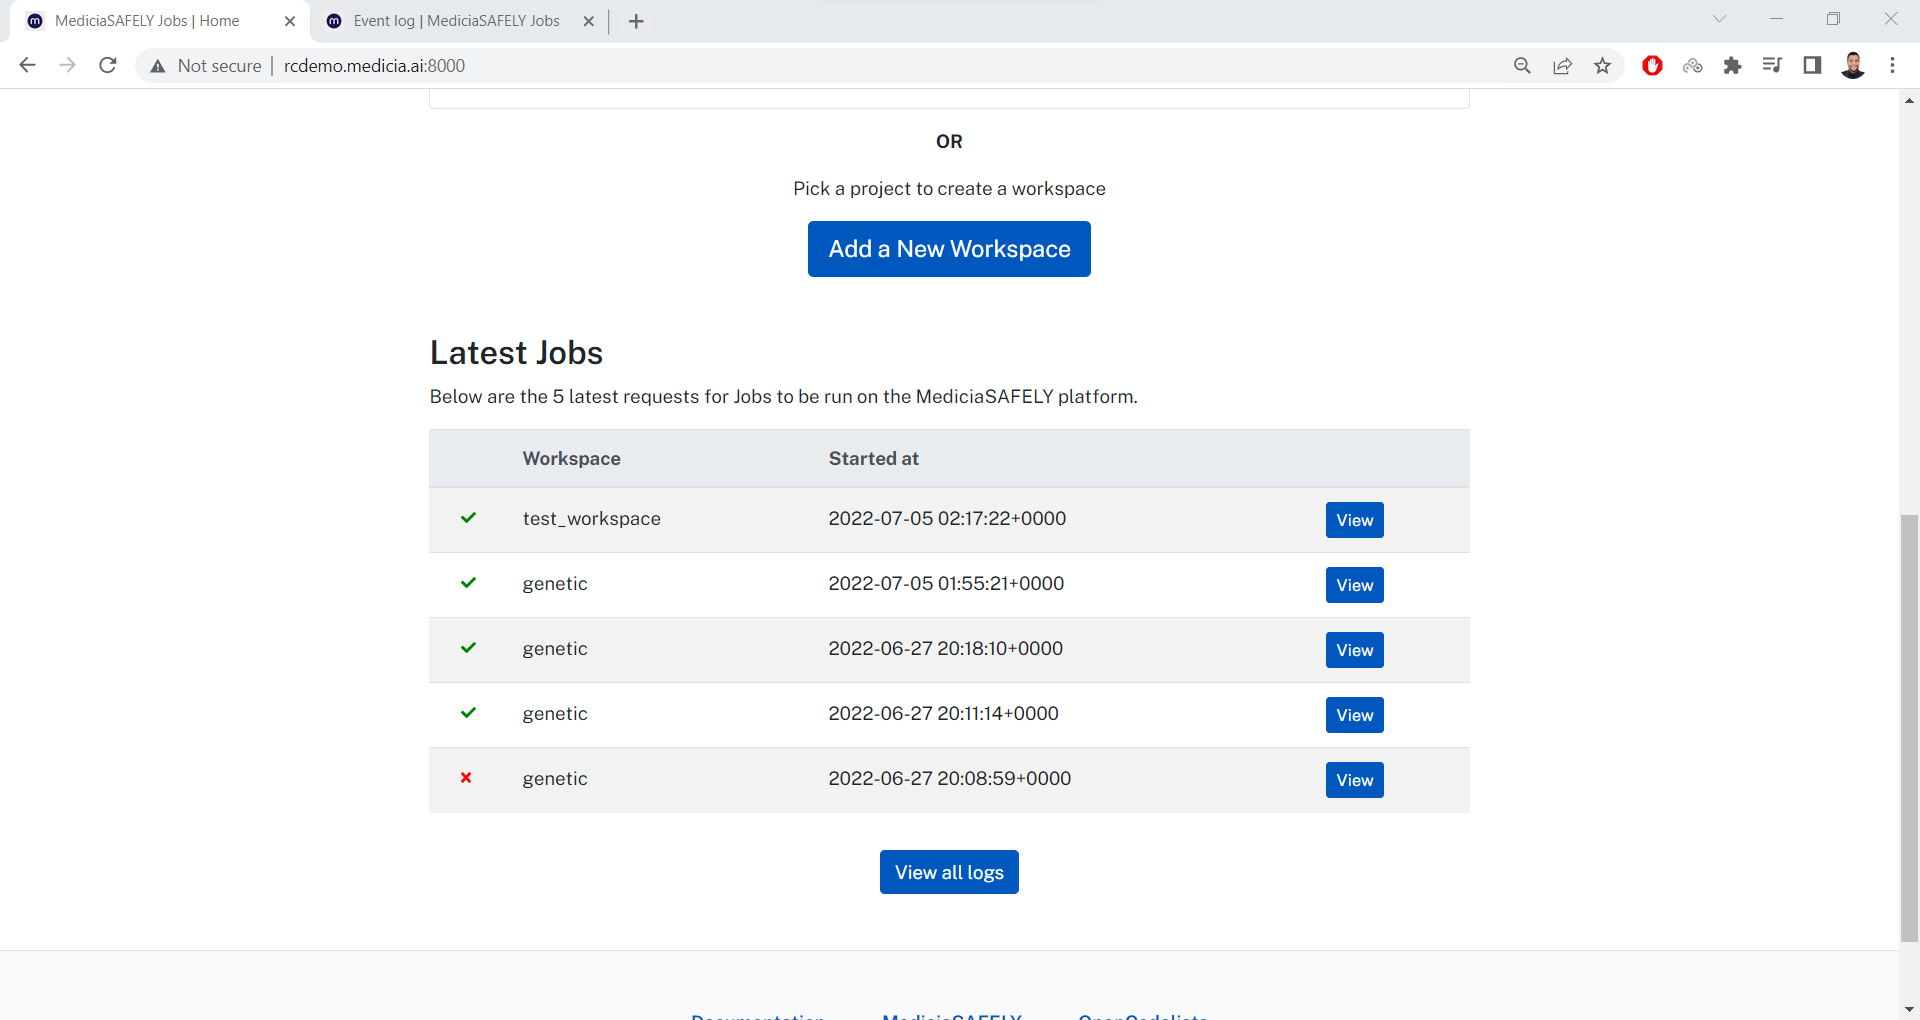
Clicking on this link goes to the events log page (https://demo.mediciaresearch.cloud/event-log).
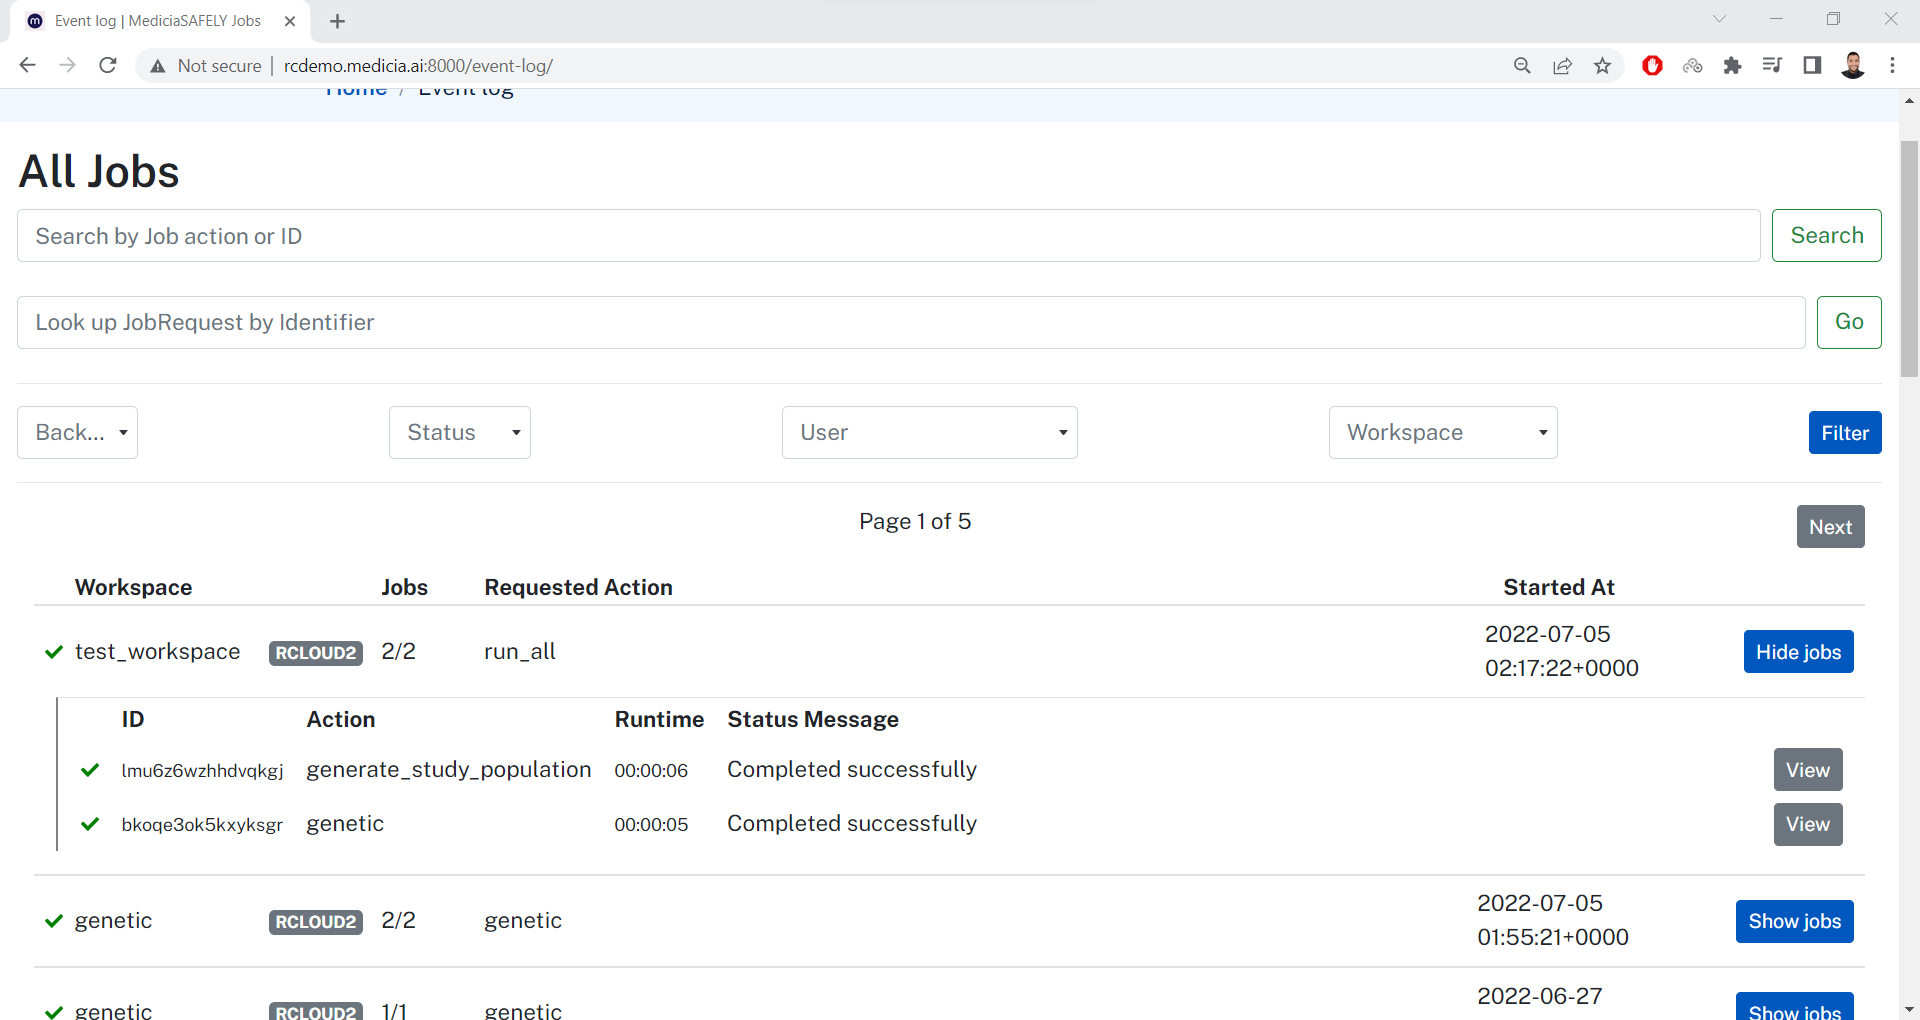
Click on the Show jobs button at the right of each row to show the
jobs handled. For example, there are 2 jobs to be executed in the first
row. The new table shows the following information:
Job request ID.
Action name.
Time consumed to complete the action.
A message indicating the status of the action.
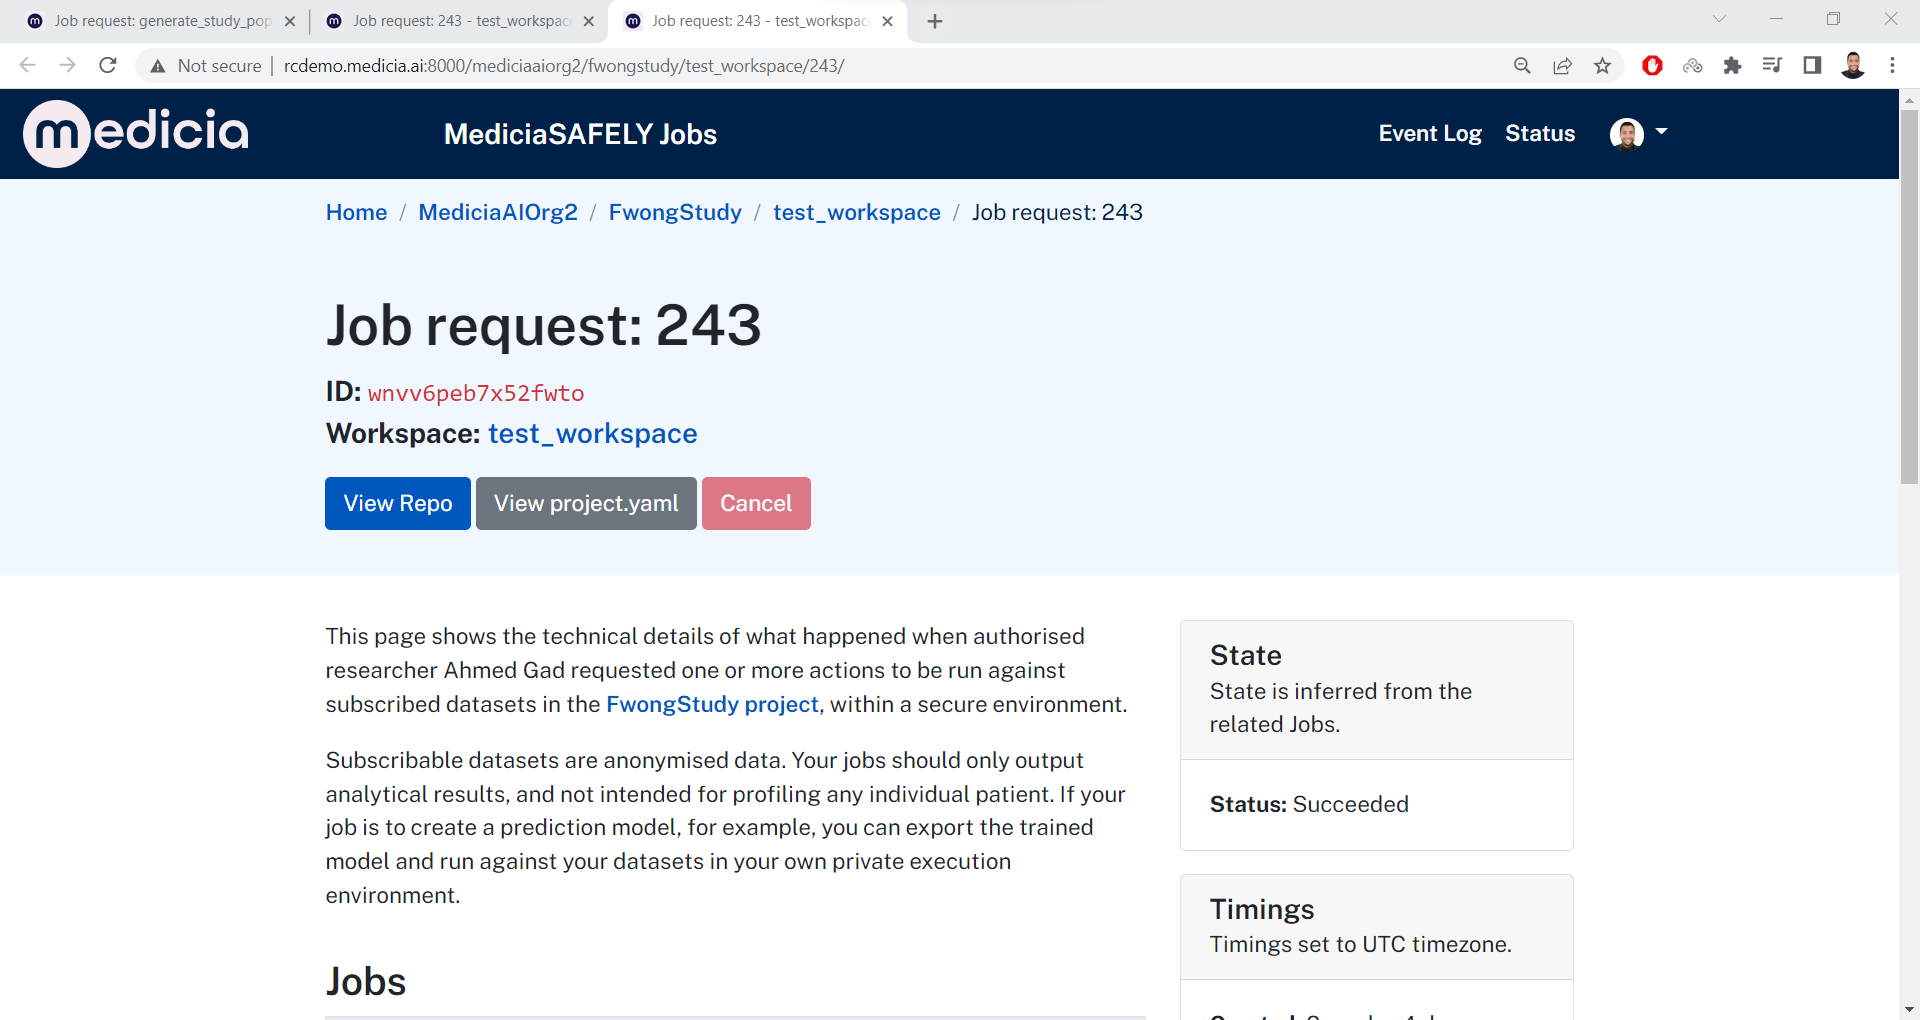
Also click the View button in gray to see more information about the
job request. For example, click the View button of the job request
with ID lmu6z6wzhhdvqkgj goes to this page:
https://demo.mediciaresearch.cloud/mediciaaiorg2/MyStudy/test_workspace/243/lmu6z6wzhhdvqkgj.
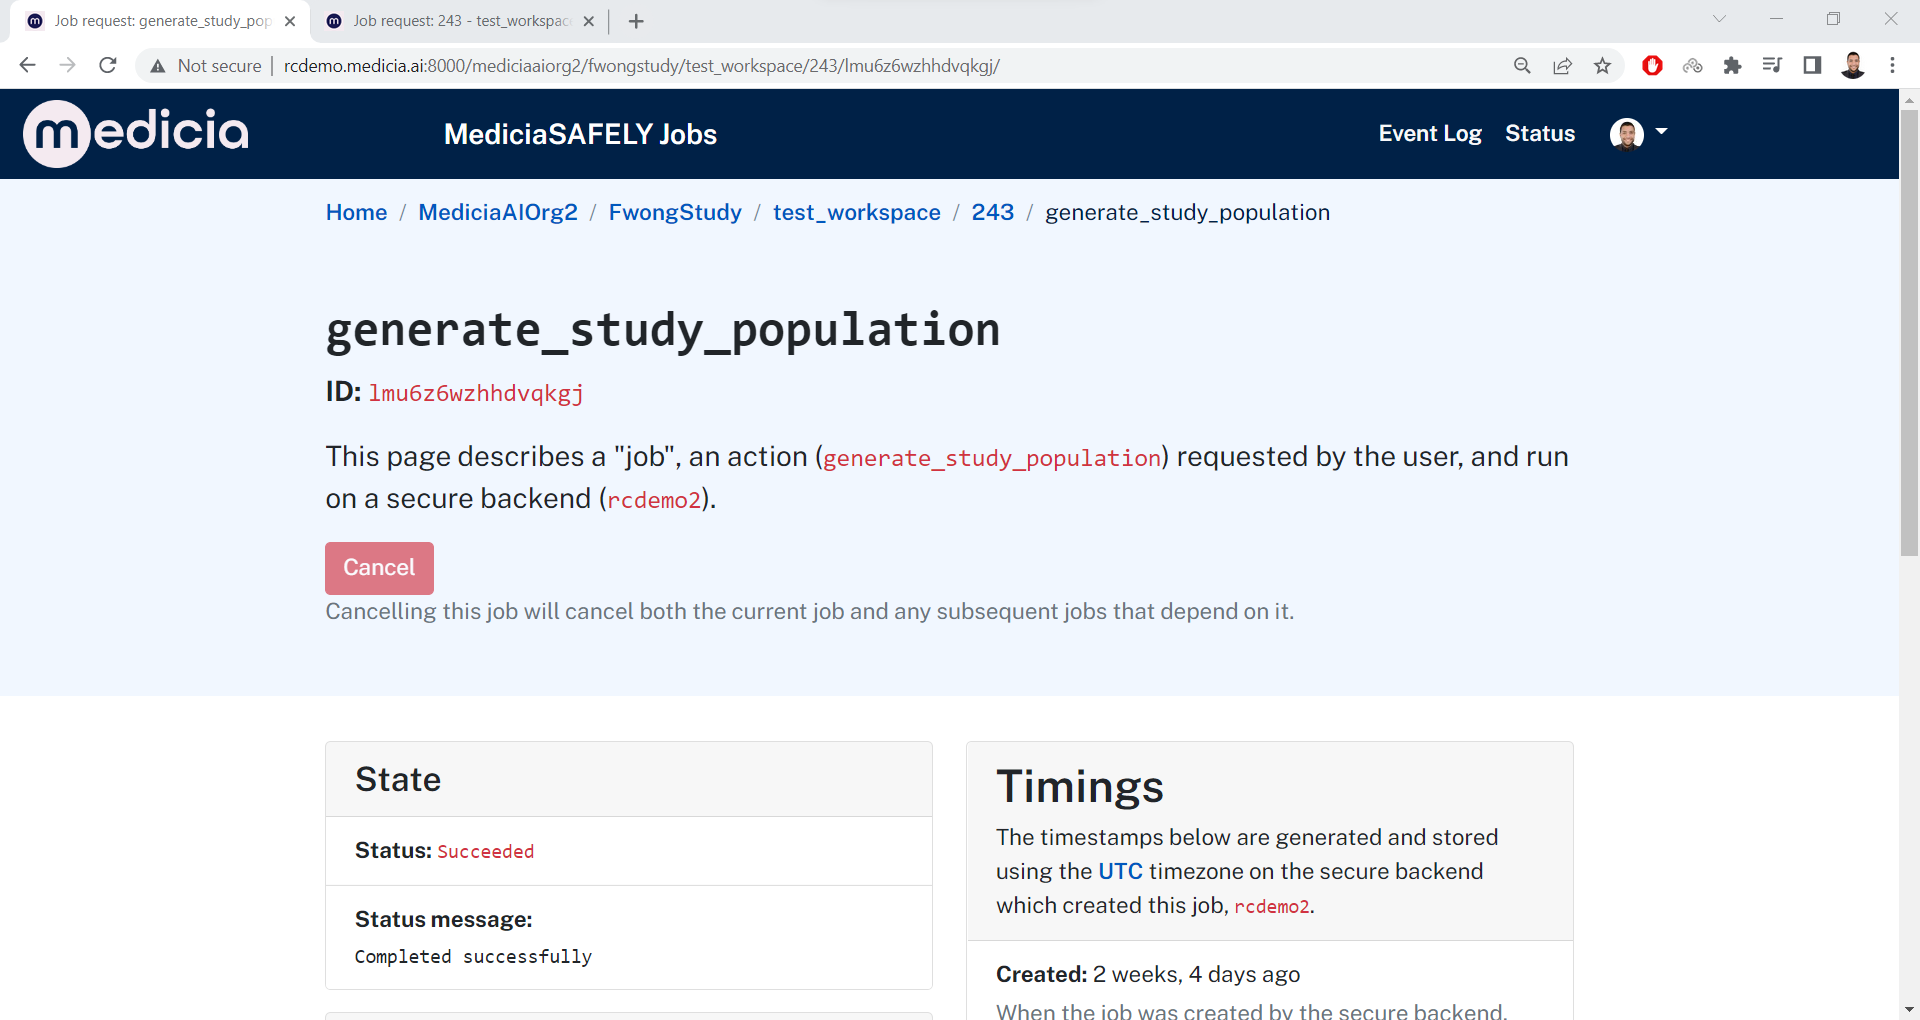
This page has 3 main sections:
State: Shows the state of the job.
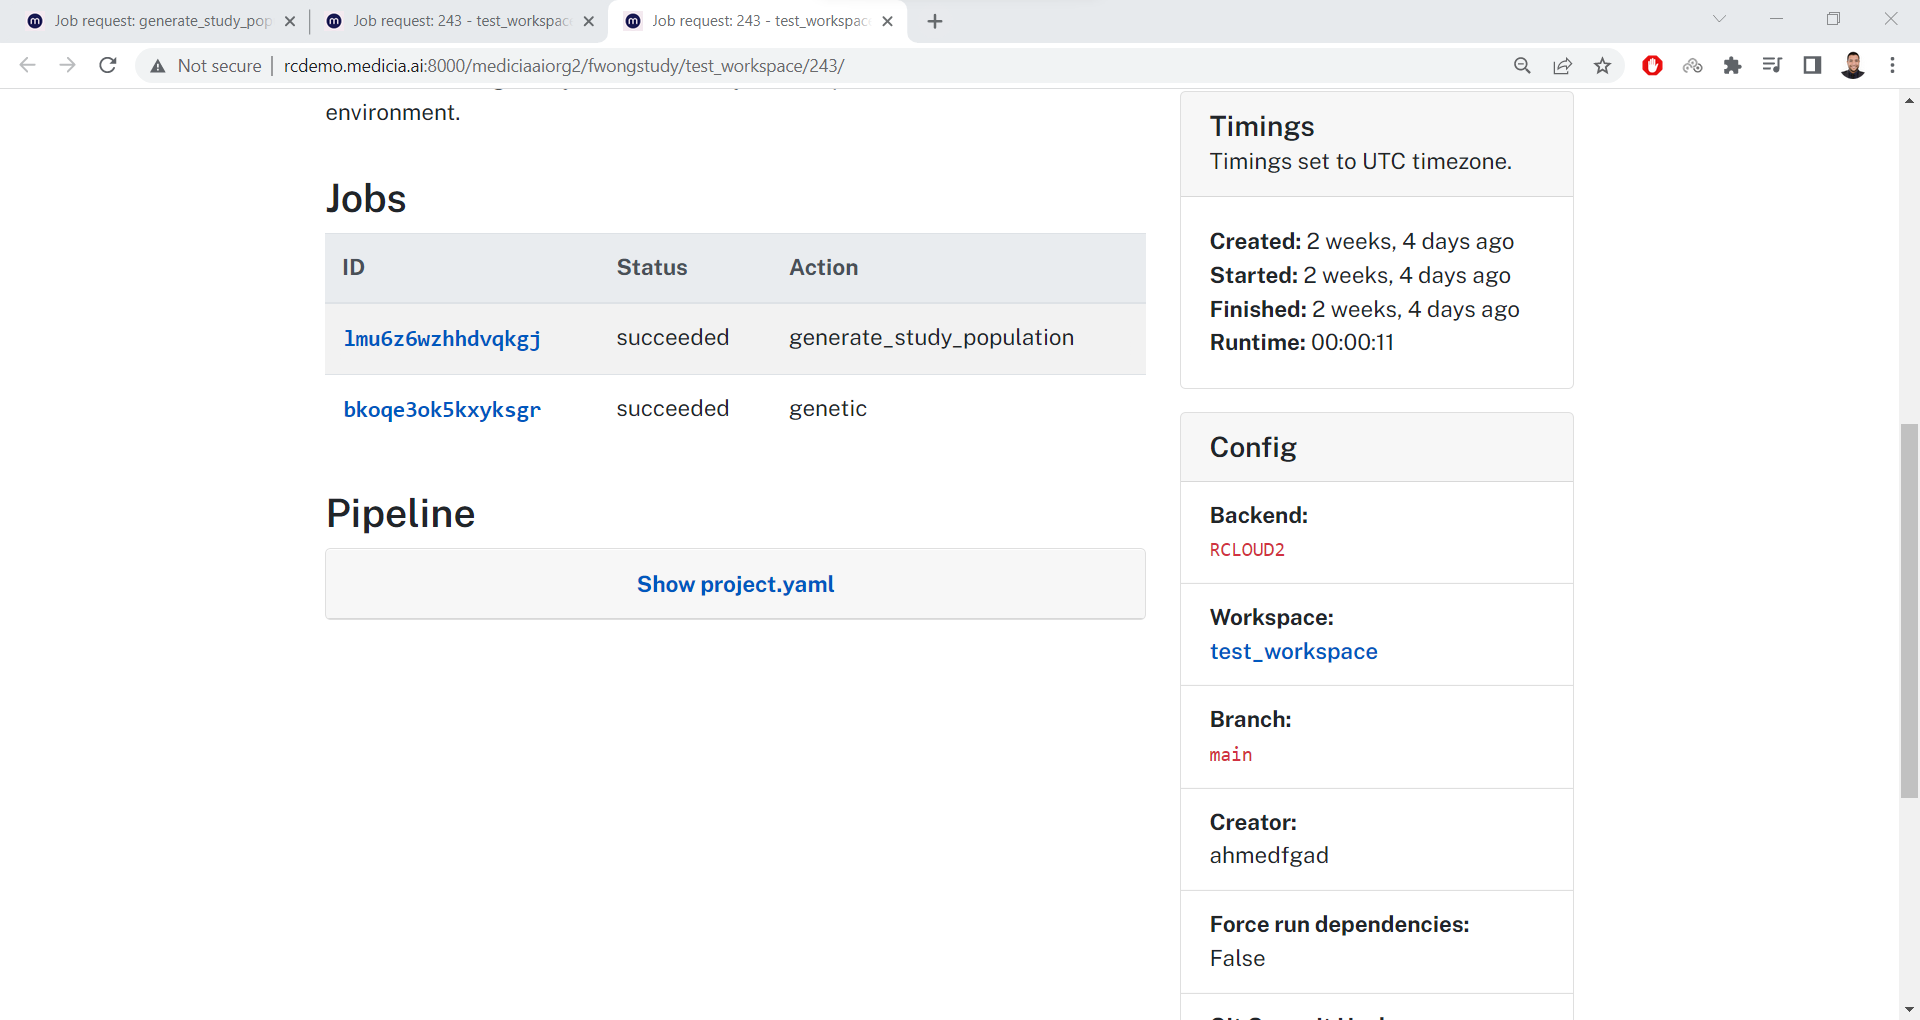
Config: Configuration of the job.
Timings.
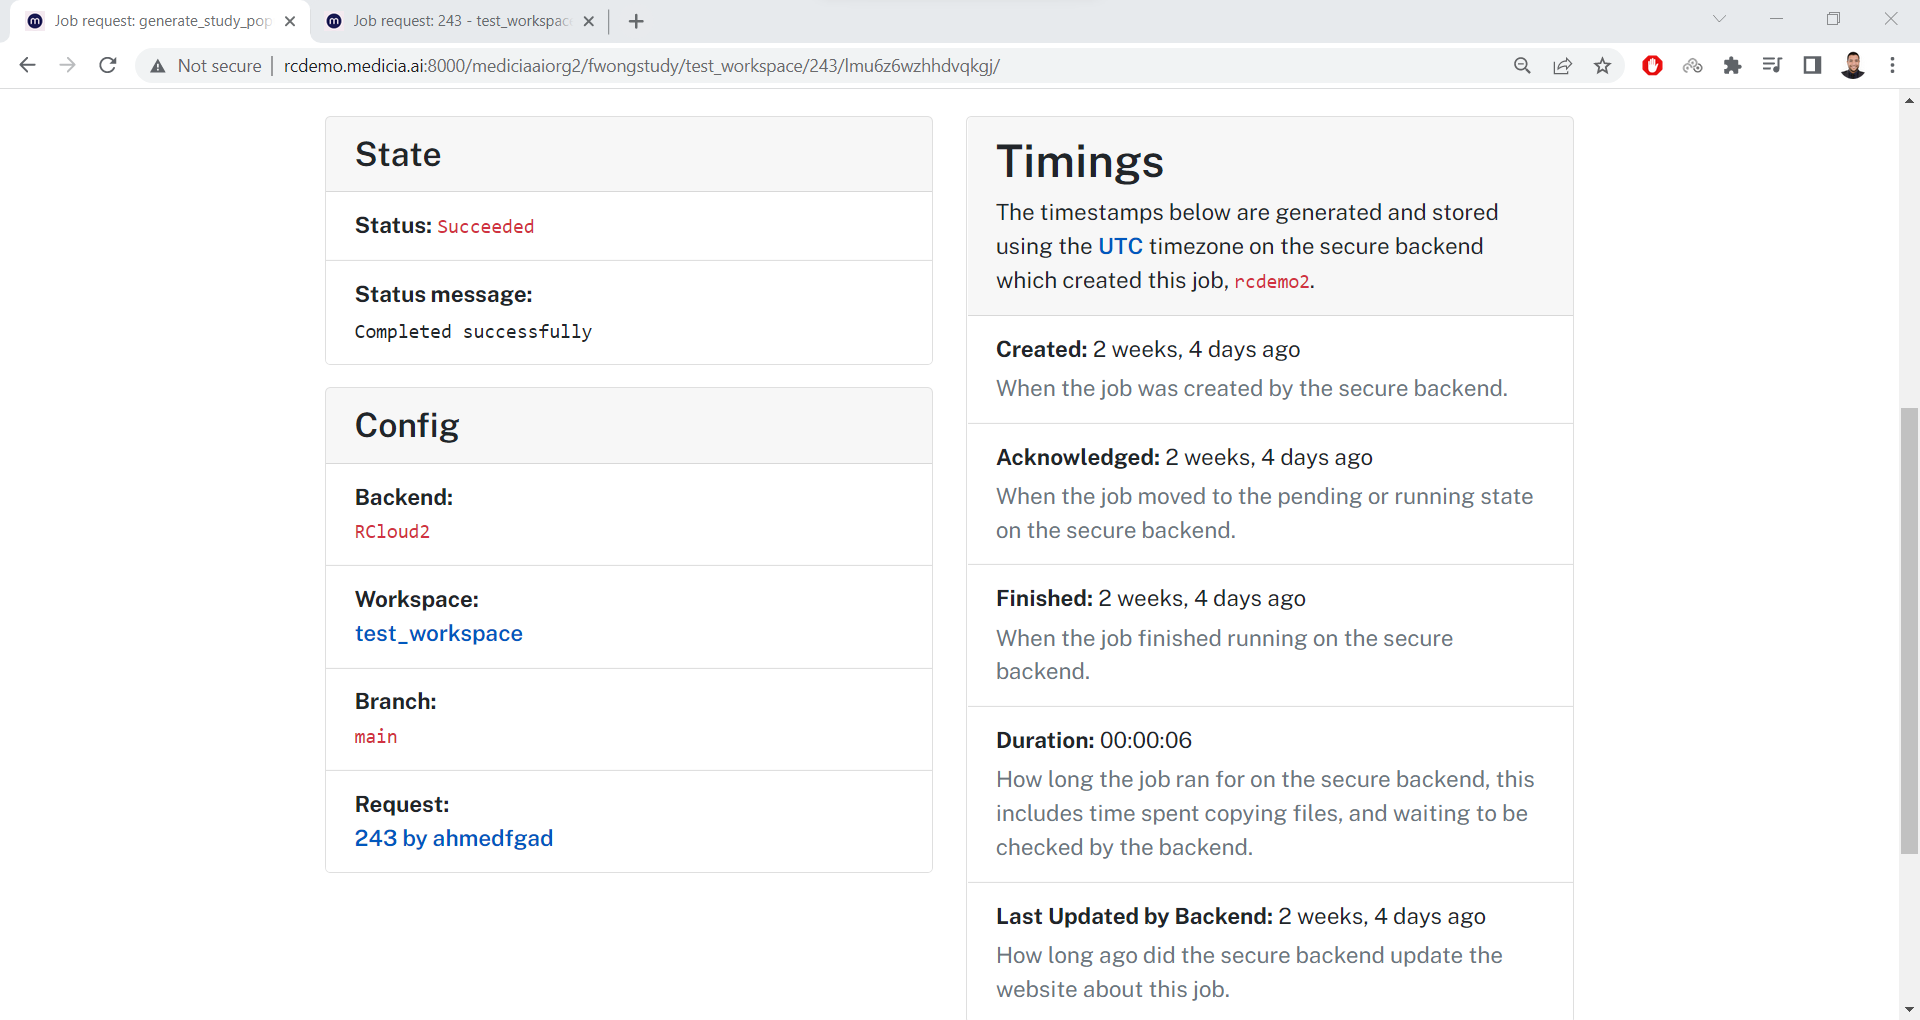
The last entry in the `Config
section <https://demo.mediciaresearch.cloud/mediciaaiorg2/MyStudy/test_workspace/243>`__
is a link to the job request. This is the page of the job request with
ID 243.
At the top, there are 3 buttons:
View Repo: This is a link to the GitHub repository.View project.yaml: A link to view theproject.yamlfile in the GitHub repository.Cancel: If the job request is still in progress, click on this button to cancel it. This button is disabled because the job request is already handled.
Down in the page, there is a list of the jobs in this job request. There
is also a button called Show project.yaml to view the
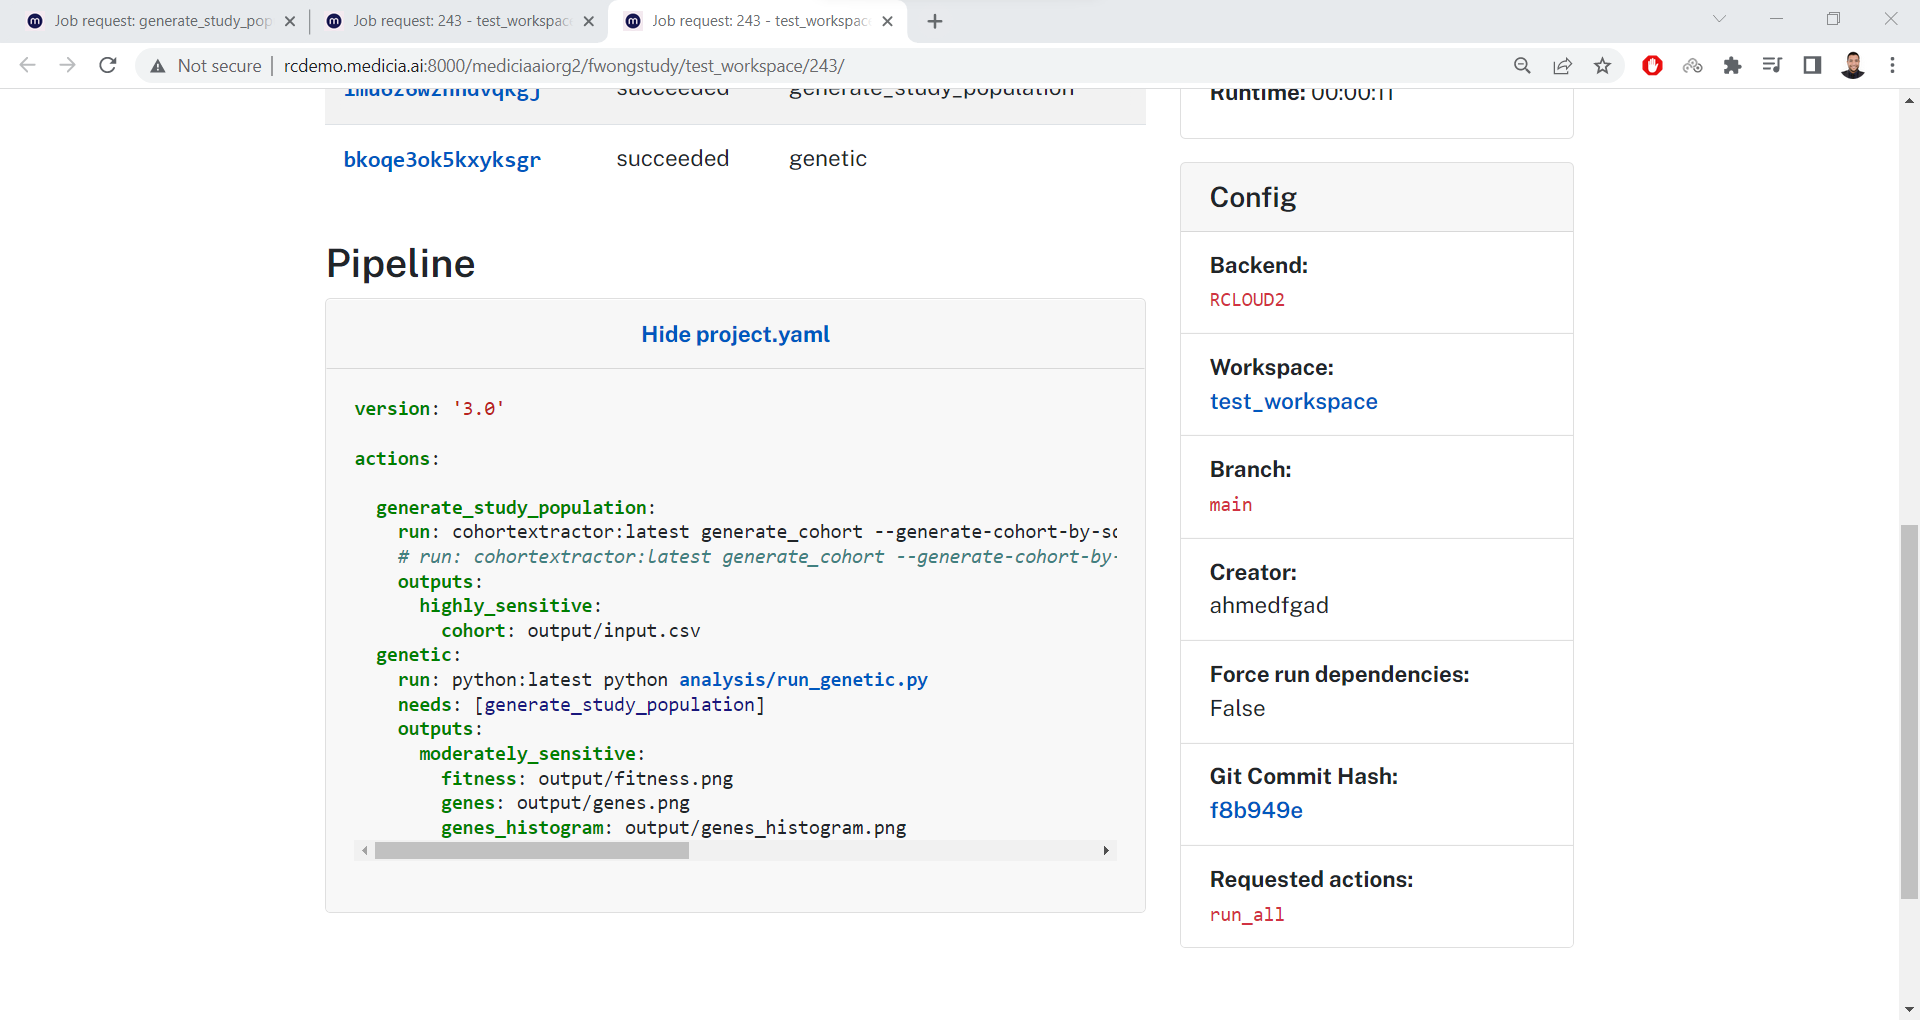
project.yaml file.
Just click this button to view the project.yaml file in the page.
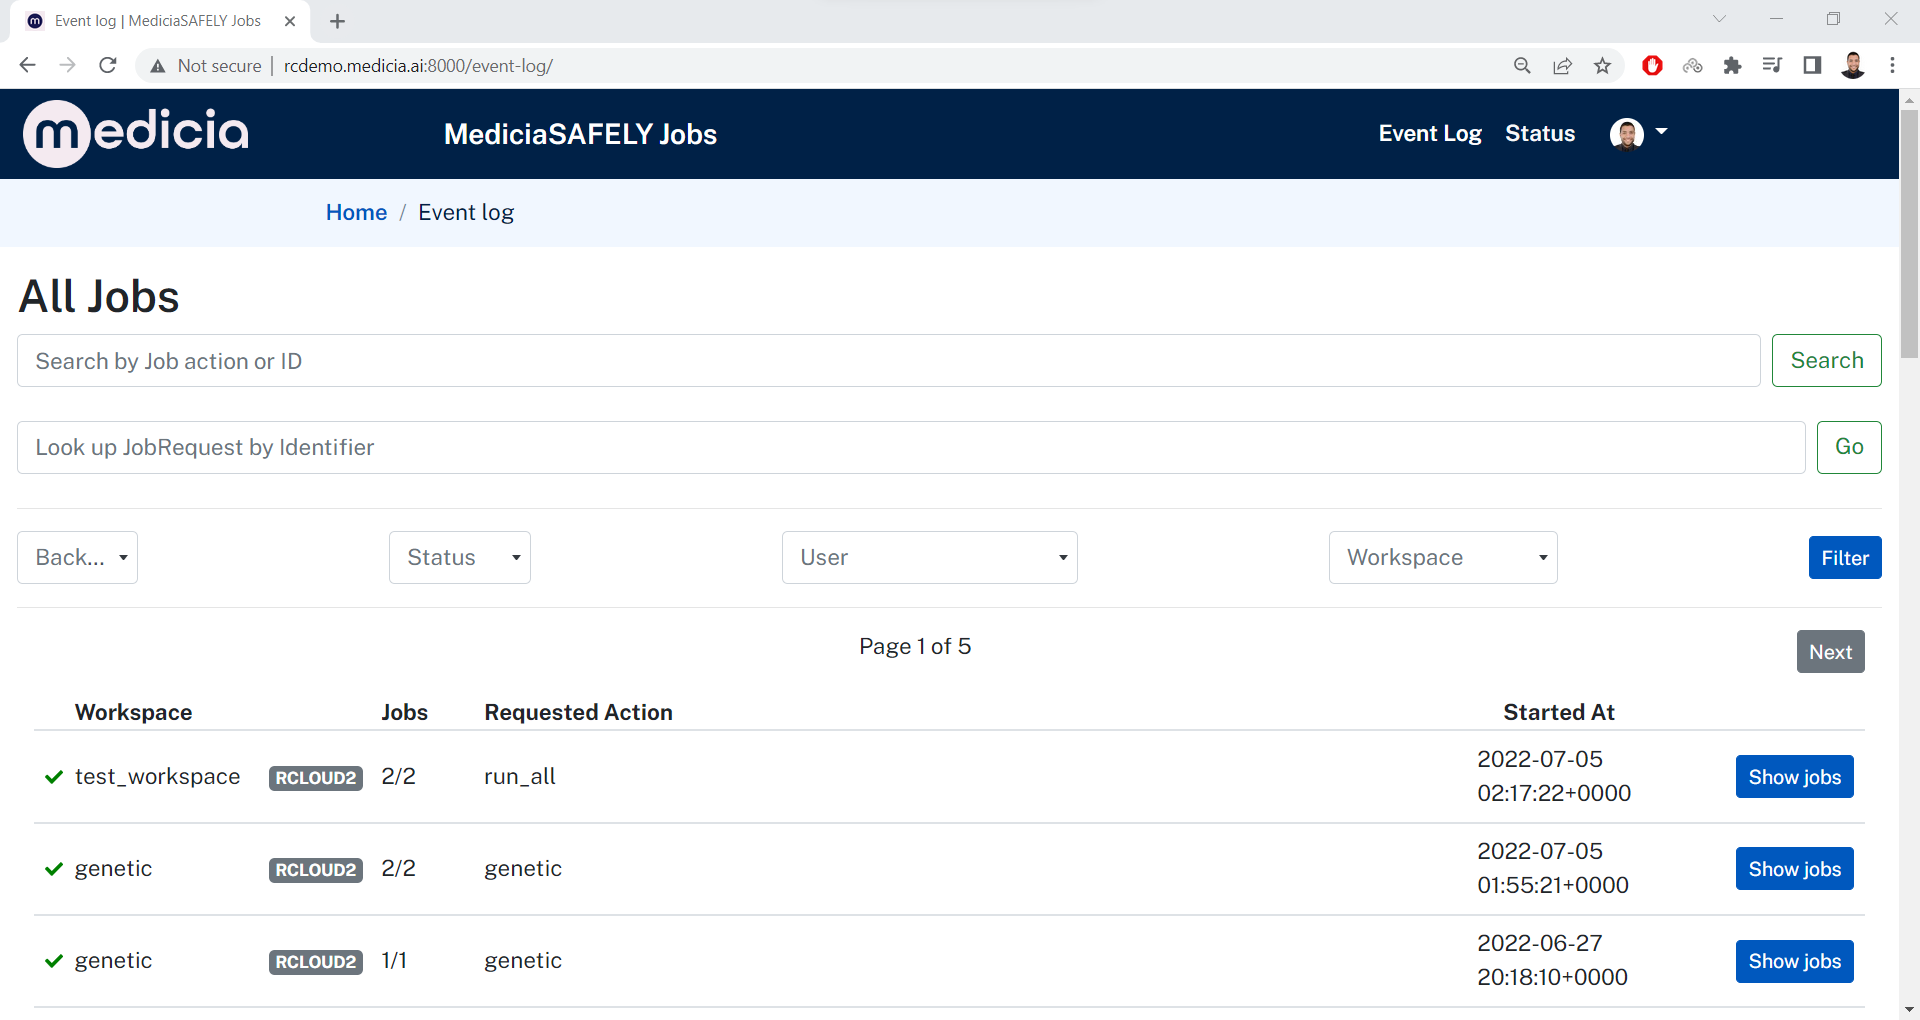
Filter the Logs
There are 2 inputs fields in the events log page:
The first field accepts the action name or job ID.
The second fields accepts the job request ID.
Just enter the value and click on the button at the right side of the
input field. For example, the next image shows the result of filtering
the jobs whose action is genetic.
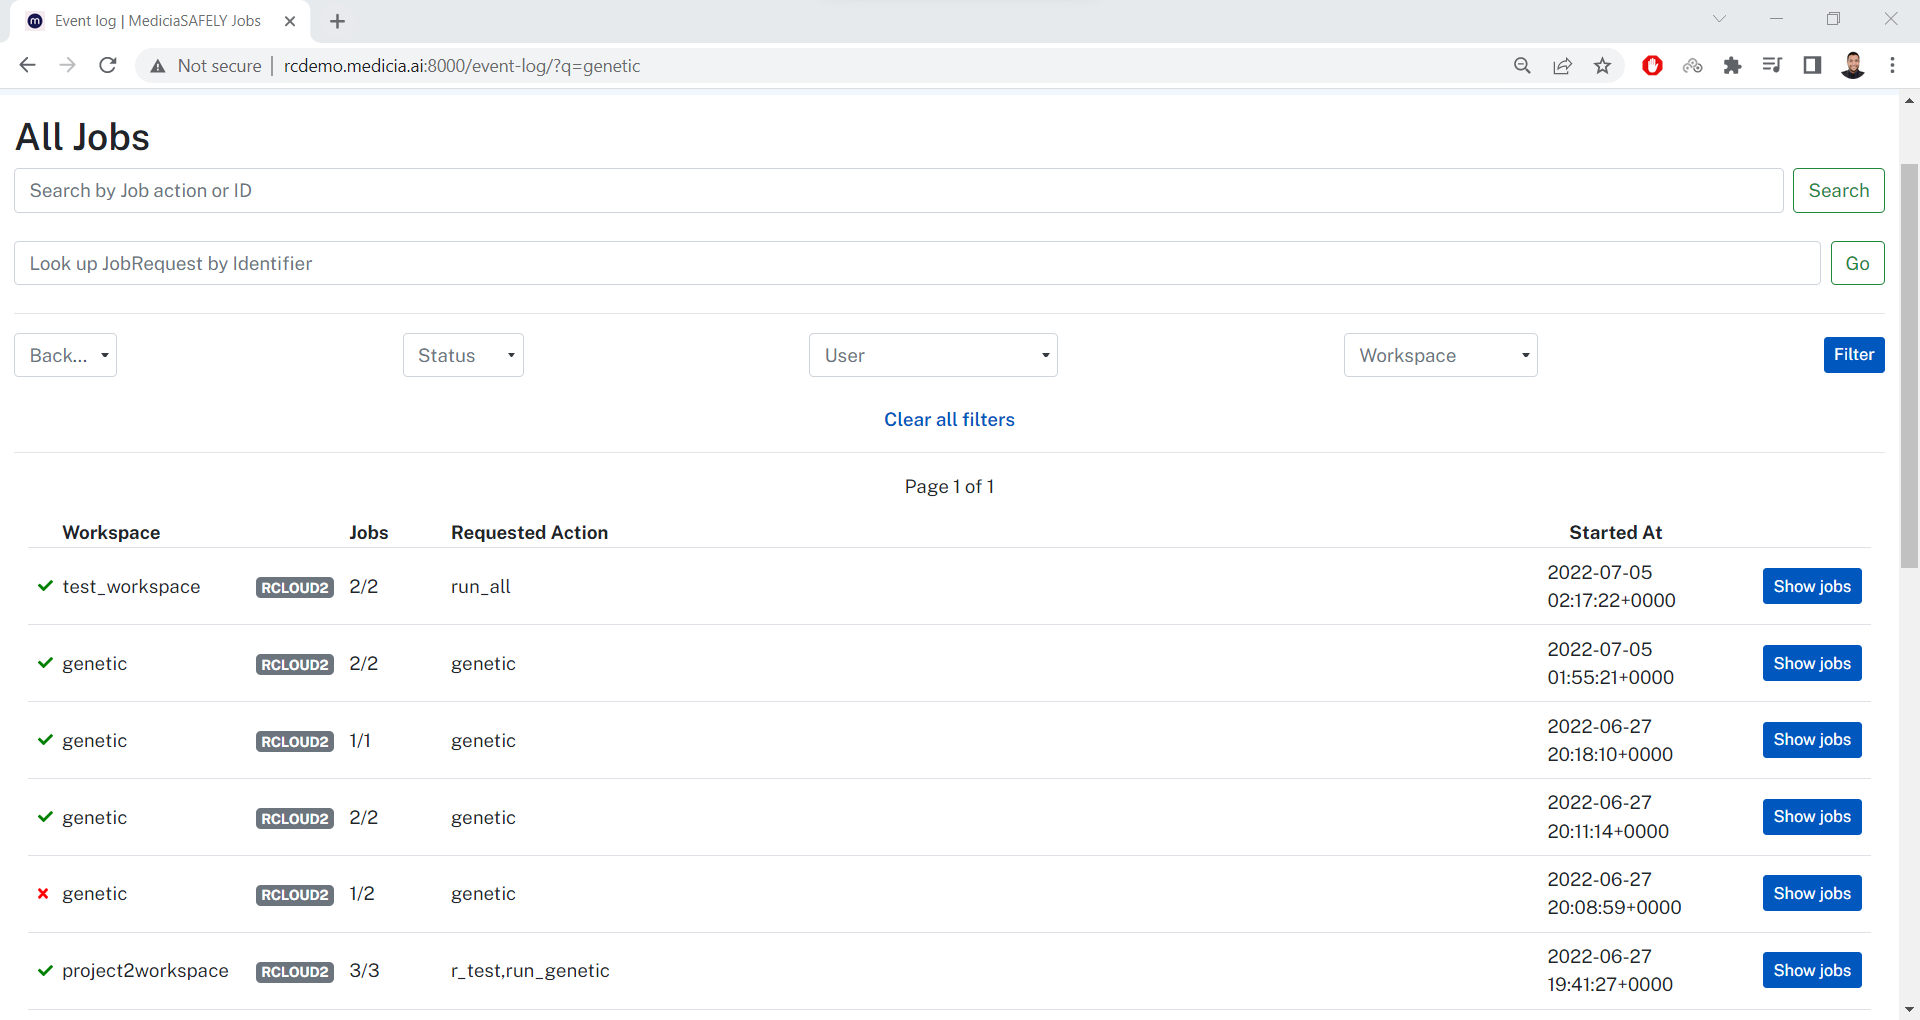
There are 4 dropdown menus that can be used to filter the actions. From left to right, the menus are:
Backend: A list of all backends.
Job status: Can be either
failed,running,pending, andsucceeded.User: A list of all users.
Workspace: A list of all workspaces.
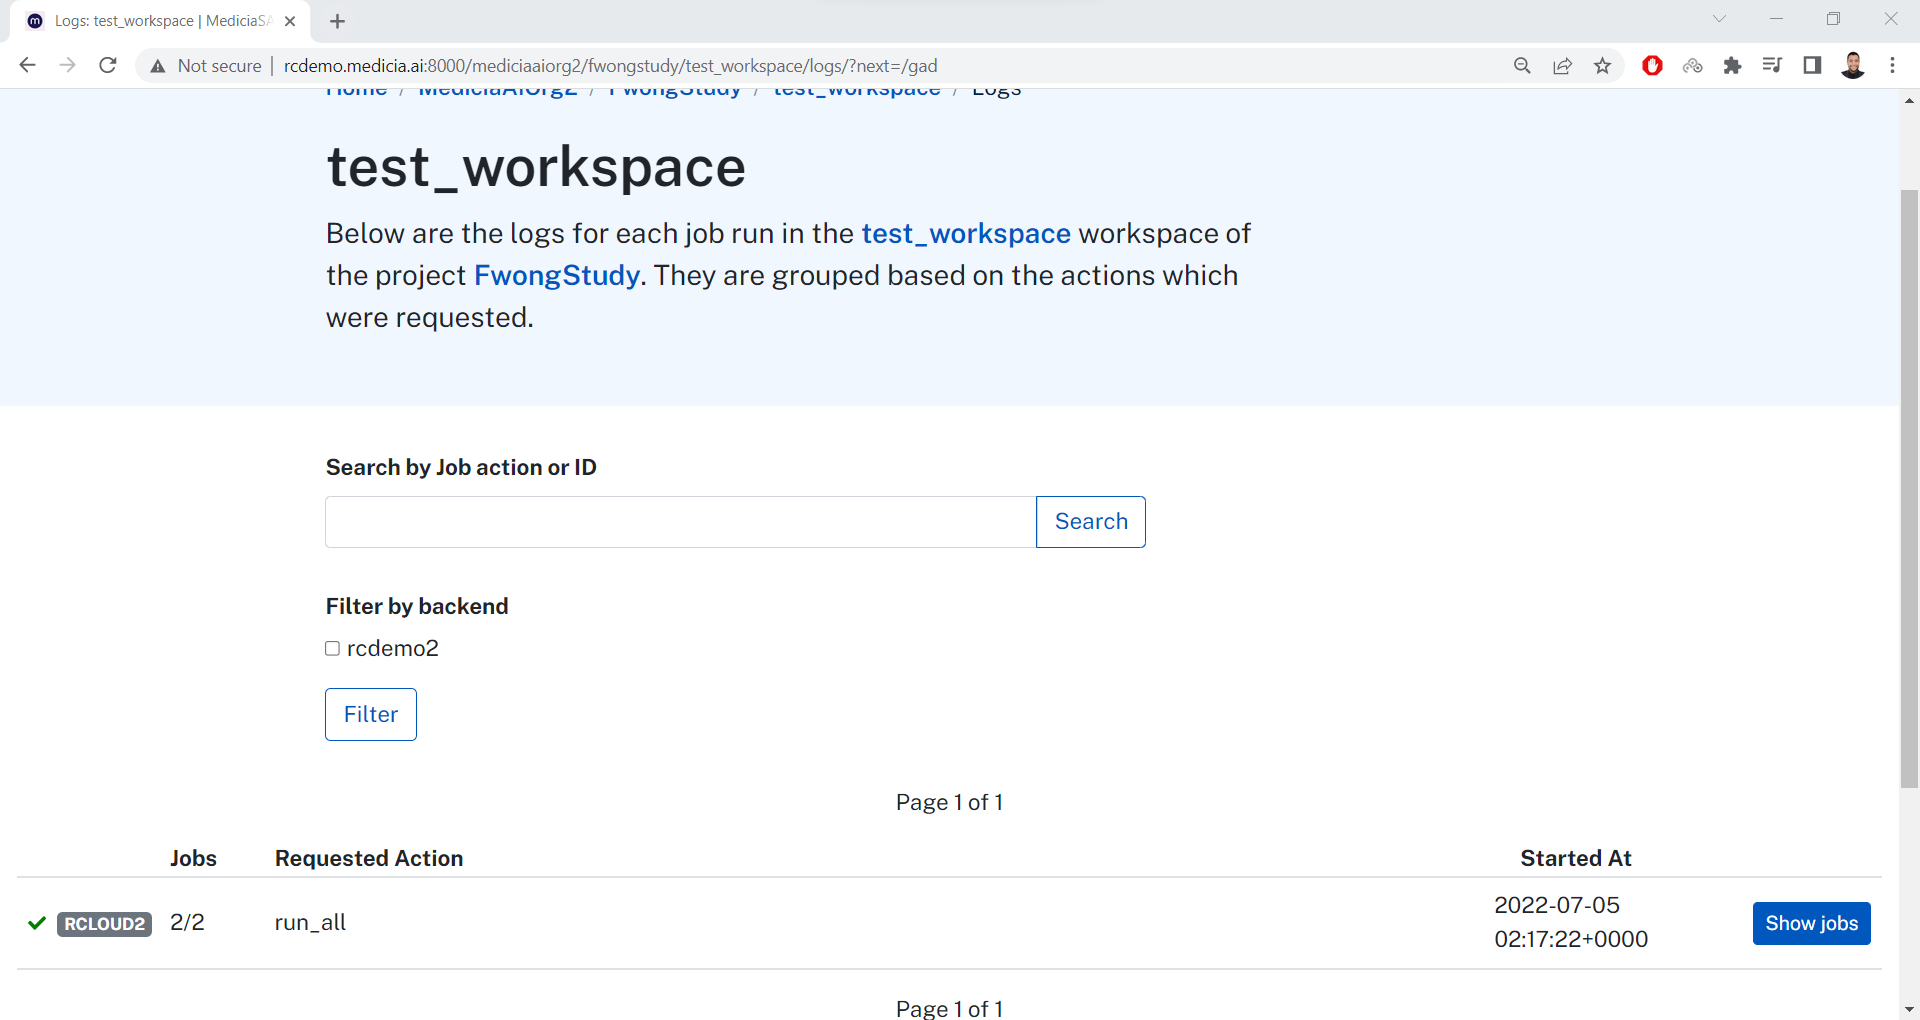
Workspace Logs
The Event Log link shows the logs of all jobs across all workspaces.
To only view the logs of a specific workspace, just visit the workspace
page.
Below the workspace name, click the View logs button. It shows the
logs for the current workspace only. Everything else is similar to what
explained previously.
User Roles
The user can view the members of the project and all of their roles from
the project page. For example, this is the page for the MyStudy
project.
Note that the Repos section shows the GitHub repositories associated
with all the workspaces existing in this project.
Down in this page, there is a Researchers section where the members
and their roles are listed.